npm install -g create-react-app
Embed with React components
The Visual Embed library for React allows you to embed ThoughtSpot components in a React application.
Before you begin🔗
Before embedding ThoughtSpot, perform the following checks:
Prepare your environment🔗
-
Check if NPM and Node.js are installed in your setup.
-
Make sure you have installed React framework and its dependencies. If React is not installed, open a terminal window and run the following command:
For information about how to install React framework, see React documentation.
-
If you do not have a React app created for ThoughtSpot integration, create a React app and install its dependencies.
-
To create a new React app, open a terminal window and execute the following command
npx create-react-app ts-data-app
In this example, the name of the app is
ts-data-app. -
Initialize the app.
npm start
-
-
Make sure a React app directory with the initial project structure is created. The app directory typically includes the following JS files:
-
Index.js
-
App.js
To add HTML code, rename these files to
.jsx. If you are building an app using TypeScript, you can rename the files to.tsx.
For information about adding TypeScript to your existing React app project, see Adding TypeScript.
-
-
If you are building a multi-page app, create a
Componentsdirectory and add new pages for ThoughtSpot components. To allow users to navigate between these pages, add routes in theApp.tsxfile.NoteA functional React app may require React hooks such as
useState,useRef, anduseEffect. For more information about React concepts and framework, see React documentation.
Verify localhost port setting🔗
By default, React uses Port 3000 as a localhost port. Make sure you add localhost:3000 as a CSP visual embed host in the Security Settings page of the Develop tab.
If you want to use Port 8000 instead, add it to the CSP allowlist and update the following script in the package.json file in your app directory.
"scripts": {
   "start": "PORT=8000 react-scripts start",
   "build": "react-scripts build",
   "test": "react-scripts test",
   "eject": "react-scripts eject"
}Get the GUIDs🔗
You will require GUIDs of the following objects to embed ThoughtSpot components.
-
The saved Answer or data source GUIDs to embed search and run a search query
-
Liveboard GUID to embed a Liveboard
-
Liveboard and visualization GUIDs to embed a visualization from a Liveboard
You can find the GUIDs of these objects in the UI, the developer Playground on your ThoughtSpot instance, or through the metadata/list and metadata/listobjectheaders REST API endpoints.
Embed a Liveboard🔗
To embed a ThoughtSpot Liveboard, complete the following steps:
Create a Liveboard component🔗
In your React app project, go to the Components directory and add a new page for Liveboard in your app directory; for example, liveboard.tsx.
-
Import the
LiveboardEmbedcomponent and event libraries:import React from "react"; import { Action, init, EmbedEvent, HostEvent, RuntimeFilterOp, } from "@thoughtspot/visual-embed-sdk"; import { LiveboardEmbed, useEmbedRef } from "@thoughtspot/visual-embed-sdk/react";If you are using Webpack 4, import the React components as shown in this example:
import { LiveboardEmbed, useEmbedRef } from '@thoughtspot/visual-embed-sdk/lib/src/react'; -
Specify the authentication method.
-
Add constructor options as props.
-
For Embed events, use the
on<EventName>convention. -
For Host events, use the
trigger(HostEvent.<EventName>)method.For more information, see EmbedEvent and HostEvent.
-
-
Render the app.
ts-data-app> npm start
Code sample🔗
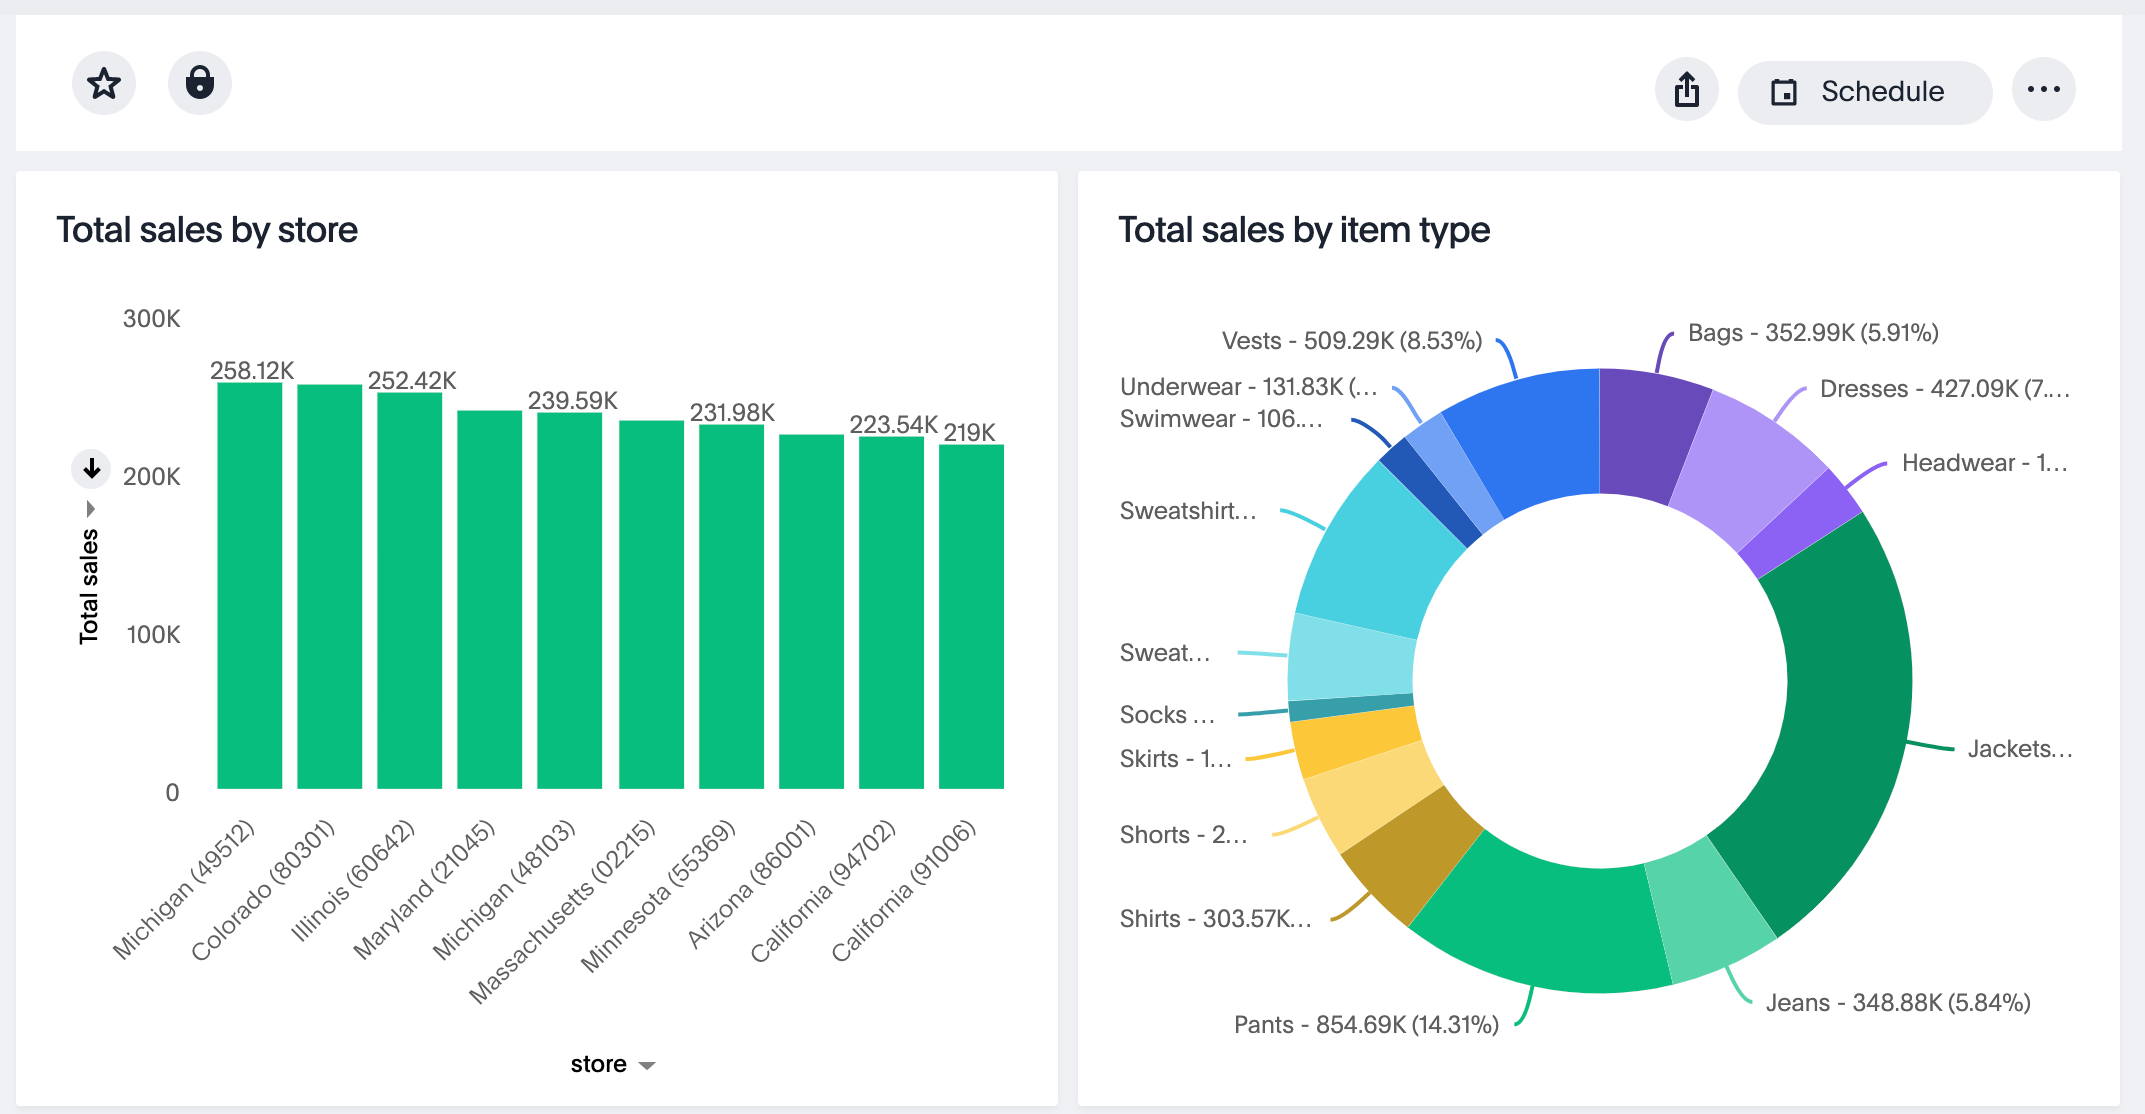
The following code sample embeds a Liveboard, disables UI actions such as Share and Delete, sets specific visualization GUIDs as visible visualizations, and registers event handlers for Init,Load, SetVisibleVizs, onLiveboardRendered, and VizPointDoubleClick.
import { init } from '@thoughtspot/visual-embed-sdk';
import { LiveboardEmbed } from '@thoughtspot/visual-embed-sdk/react';

// If you are using Webpack 4 (which is the default when using create-react-app v4), you would need to import
// the React components using the below:
// import { LiveboardEmbed } from '@thoughtspot/visual-embed-sdk/lib/src/react';

init({
    thoughtSpotHost: '<%=tshost%>',
    authType: AuthType.None,
});

const Liveboard = ({liveboardId}) => {
   const ref = useEmbedRef<typeof LiveboardEmbed>();
    //apply runtime filters
   const runtimeFilters = [
      {
        columnName: "state",
        operator: RuntimeFilterOp.EQ,
        values: ["michigan"],
      },
    ];
   const onLoad = () => {
   console.log(EmbedEvent.Load, {});
   };
   //Register an event handler to trigger the SetVisibleVizs event when the Liveboard is rendered
    const onLiveboardRendered = () => {
      embedRef.current.trigger(HostEvent.SetVisibleVizs, [
         "3f84d633-e325-44b2-be25-c6650e5a49cf",
         "28b73b4a-1341-4535-ab71-f76b6fe7bf92",
        ]);
      };
   return (
    <LiveboardEmbed
        frameParams={{
            height: 400,
        }}
        ref={embedRef}
        liveboardId="d084c256-e284-4fc4-b80c-111cb606449a"
        runtimeFilters={runtimeFilters}
        onLoad={onLoad}
        onLiveboardRendered={onLiveboardRendered}
    />
  );
};
For more information about LiveboardEmbed object and properties, see the following pages:
Test your app🔗
-
Load the embedded Liveboard in your app.
-
Check if the registered events are triggered and logged in the console.
Embed a visualization🔗
To embed a ThoughtSpot Liveboard, complete the following steps:
Create a visualization component🔗
In your React app project, go to the Components folder in your app directory and add a new page for visualization; for example, viz.tsx.
-
Import the
LiveboardEmbedcomponent and event libraries:import React from "react"; import { Action, init, EmbedEvent, HostEvent, RuntimeFilterOp, } from "@thoughtspot/visual-embed-sdk"; import { LiveboardEmbed, useEmbedRef } from "@thoughtspot/visual-embed-sdk/react";If you are using Webpack 4, import the React components as shown in this example:
import { LiveboardEmbed, useEmbedRef } from '@thoughtspot/visual-embed-sdk/lib/src/react'; -
Initialize the SDK and specify the authentication method.
-
Add constructor options as props.
-
For Embed events, use the
on<EventName>convention. -
For Host events, use the
trigger(HostEvent.<EventName>)method.For more information, see EmbedEvent and HostEvent.
-
-
Render the app.
ts-data-app> npm start
Code sample🔗
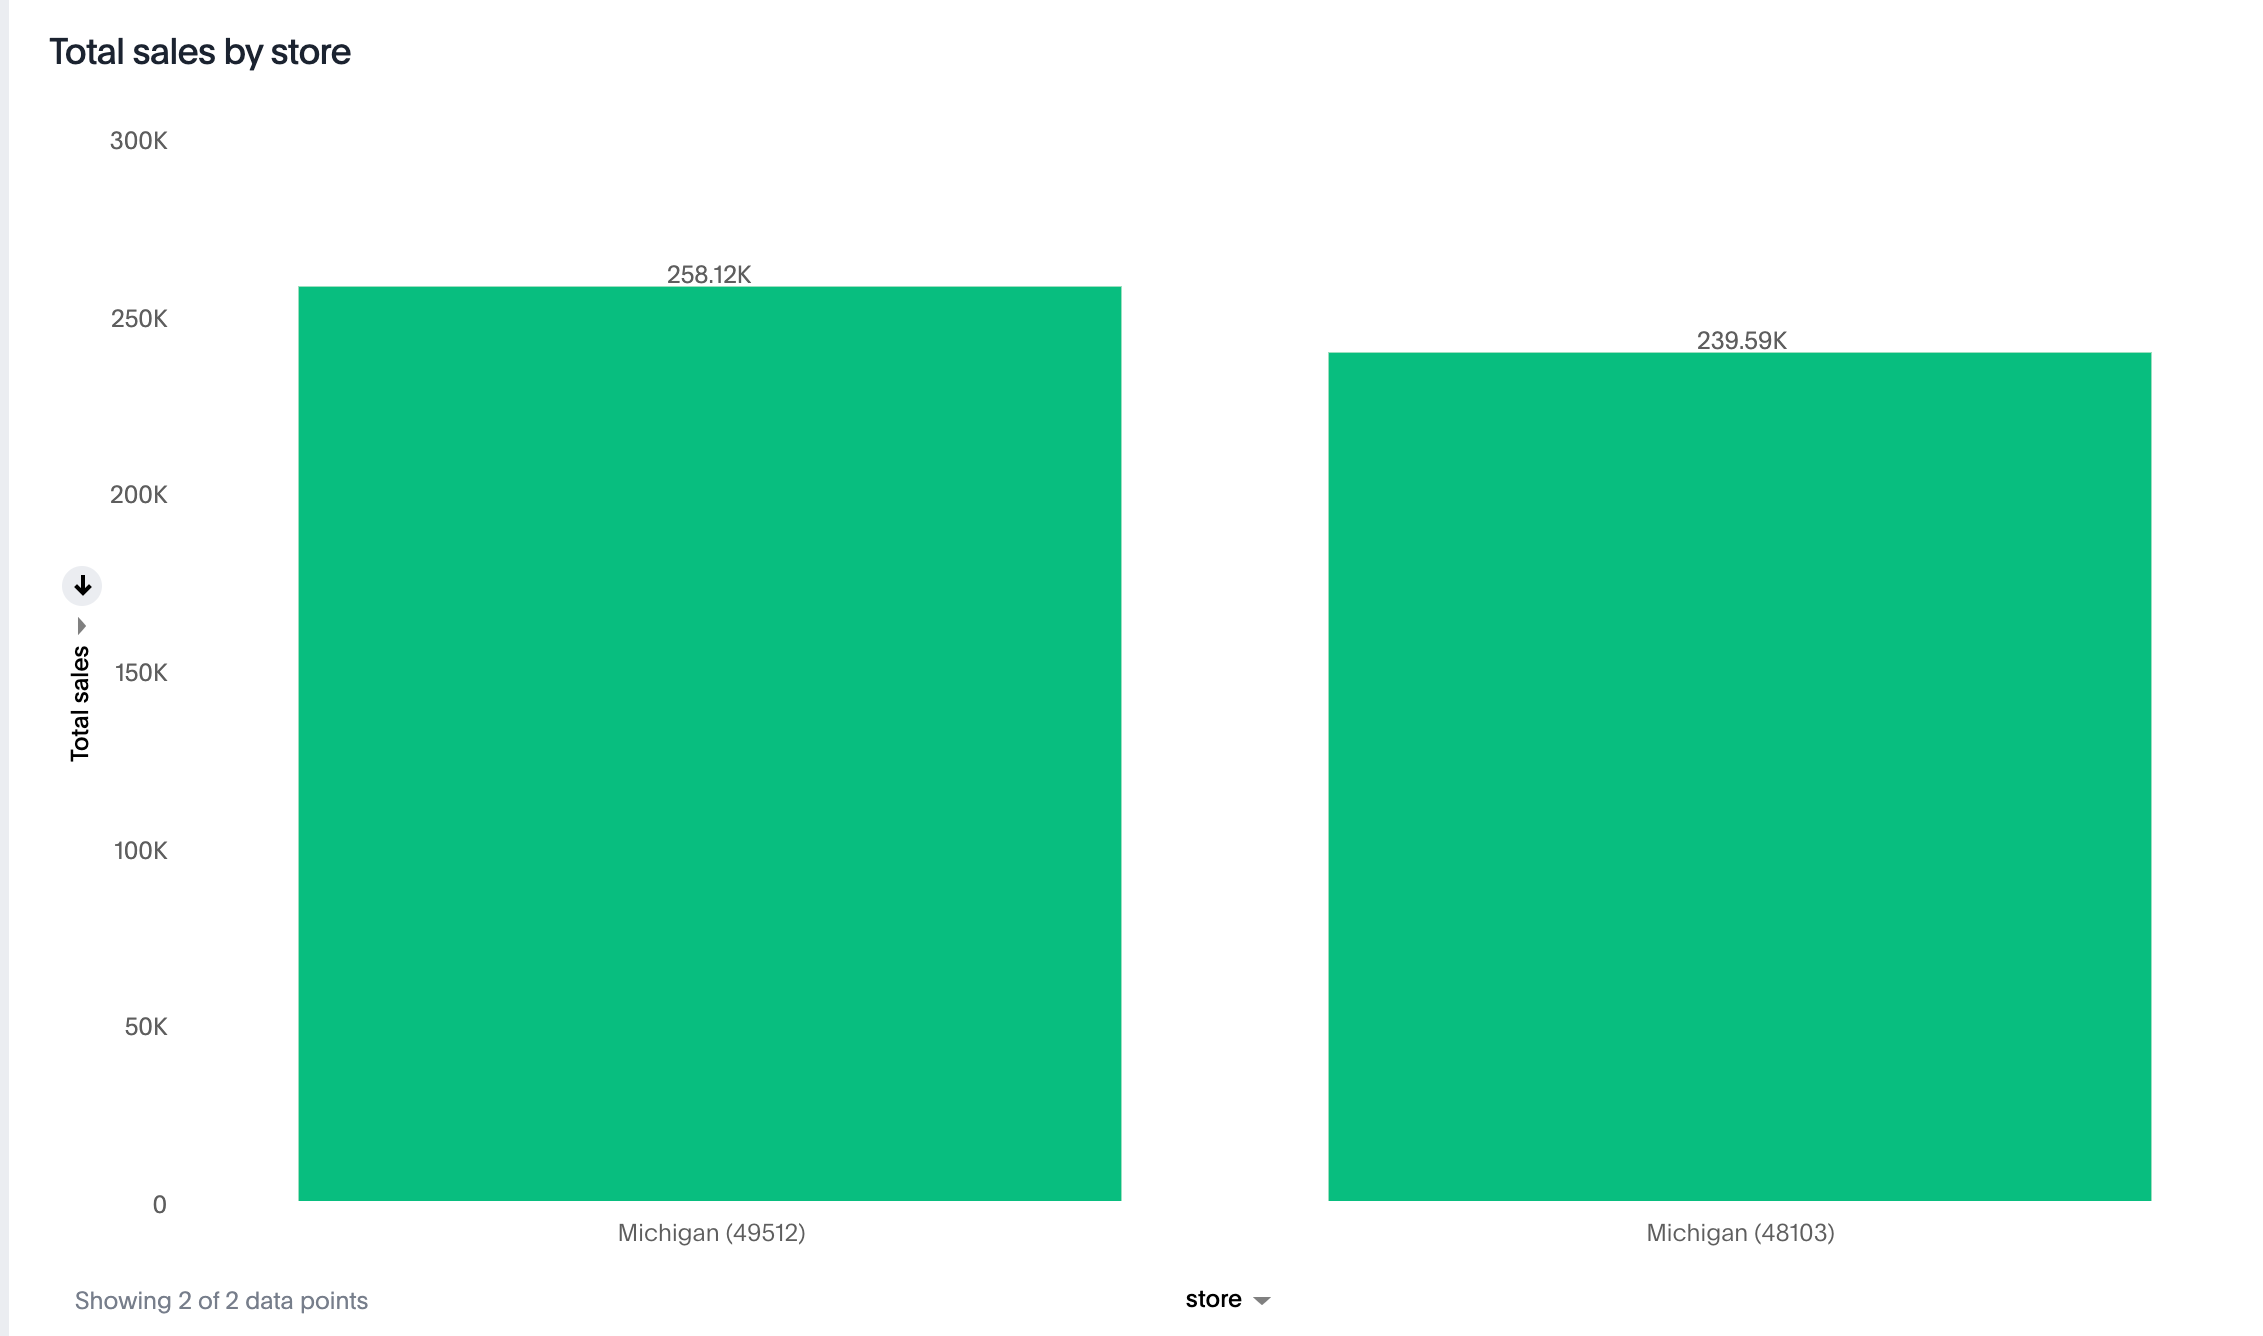
The following example includes the viz function with the Liveboard and visualization GUIDs and registers event handlers for Init and Load.
import { init } from '@thoughtspot/visual-embed-sdk';
import { LiveboardEmbed } from '@thoughtspot/visual-embed-sdk/react';

// If you are using Webpack 4 (which is the default when using create-react-app v4), you would need to import
// the React components using the below:
import { LiveboardEmbed } from '@thoughtspot/visual-embed-sdk/lib/src/react';

init({
    thoughtSpotHost: '<%=tshost%>',
    authType: AuthType.None,
});
const vizEmbed = ({liveboardId}) => {
    const viz = ({ vizId }) => {
    // Register event handlers
    const onLoad = () => {
    console.log(EmbedEvent.Load, {});
    };
   };
   return (
     <LiveboardEmbed
        frameParams={{
          height: 400,
        }}
        liveboardId="d084c256-e284-4fc4-b80c-111cb606449a"
        vizId="3f84d633-e325-44b2-be25-c6650e5a49cf"
        onLoad={onLoad}
     />
   );
};
For more information about visualization objects and its properties, see the following pages:
Test your app🔗
-
Verify if the embedded visualization is rendered correctly.
-
Check if the registered events are triggered and logged in the console.
-
Check if the registered events are emitted and logged in the console.
Embed full app🔗
To full ThoughtSpot application, complete the following steps:
Create a full app component🔗
In your React app project, go to the Components folder in your app directory and add a new page for full application embed: for example, fullApp.tsx.
-
Import the
AppEmbedcomponent and event libraries:import React from "react"; import { Action, init, EmbedEvent, HostEvent, Page } from "@thoughtspot/visual-embed-sdk"; import { AppEmbed, useEmbedRef } from '@thoughtspot/visual-embed-sdk/react';If you are using Webpack 4, import the React components as shown in this example:
import { AppEmbed, useEmbedRef } from '@thoughtspot/visual-embed-sdk/lib/src/react';Note that the import includes
Page. ThePageenumeration is required to set a specific ThoughtSpot page as a home tab when the application loads. -
Initialize the SDK and specify the authentication method.
-
Add constructor options as props.
-
For Embed events, use the
on<EventName>convention. -
For Host events, use the
trigger(HostEvent.<EventName>)method.For more information, see EmbedEvent and HostEvent.
-
-
Render the app.
ts-data-app> npm start
Code sample🔗
The following example includes a FullApp function with the Page.Home set as the default tab and registers event handlers for Init and Load.
const FullApp = () => {
  // Register event handlers
  const onLoad = () => {
    console.log(EmbedEvent.Load, {});
  };
  return (
    <AppEmbed
      frameParams={{
        height: 600,
      }}
      pageId={Page.Home}
      onLoad={onLoad}
    />
  );
};
For a complete list of AppEmbed attributes and events, see the following pages:
Test your app🔗
-
Load your application.
-
Check if the default home page is the same as you defined in the
pageIdattribute.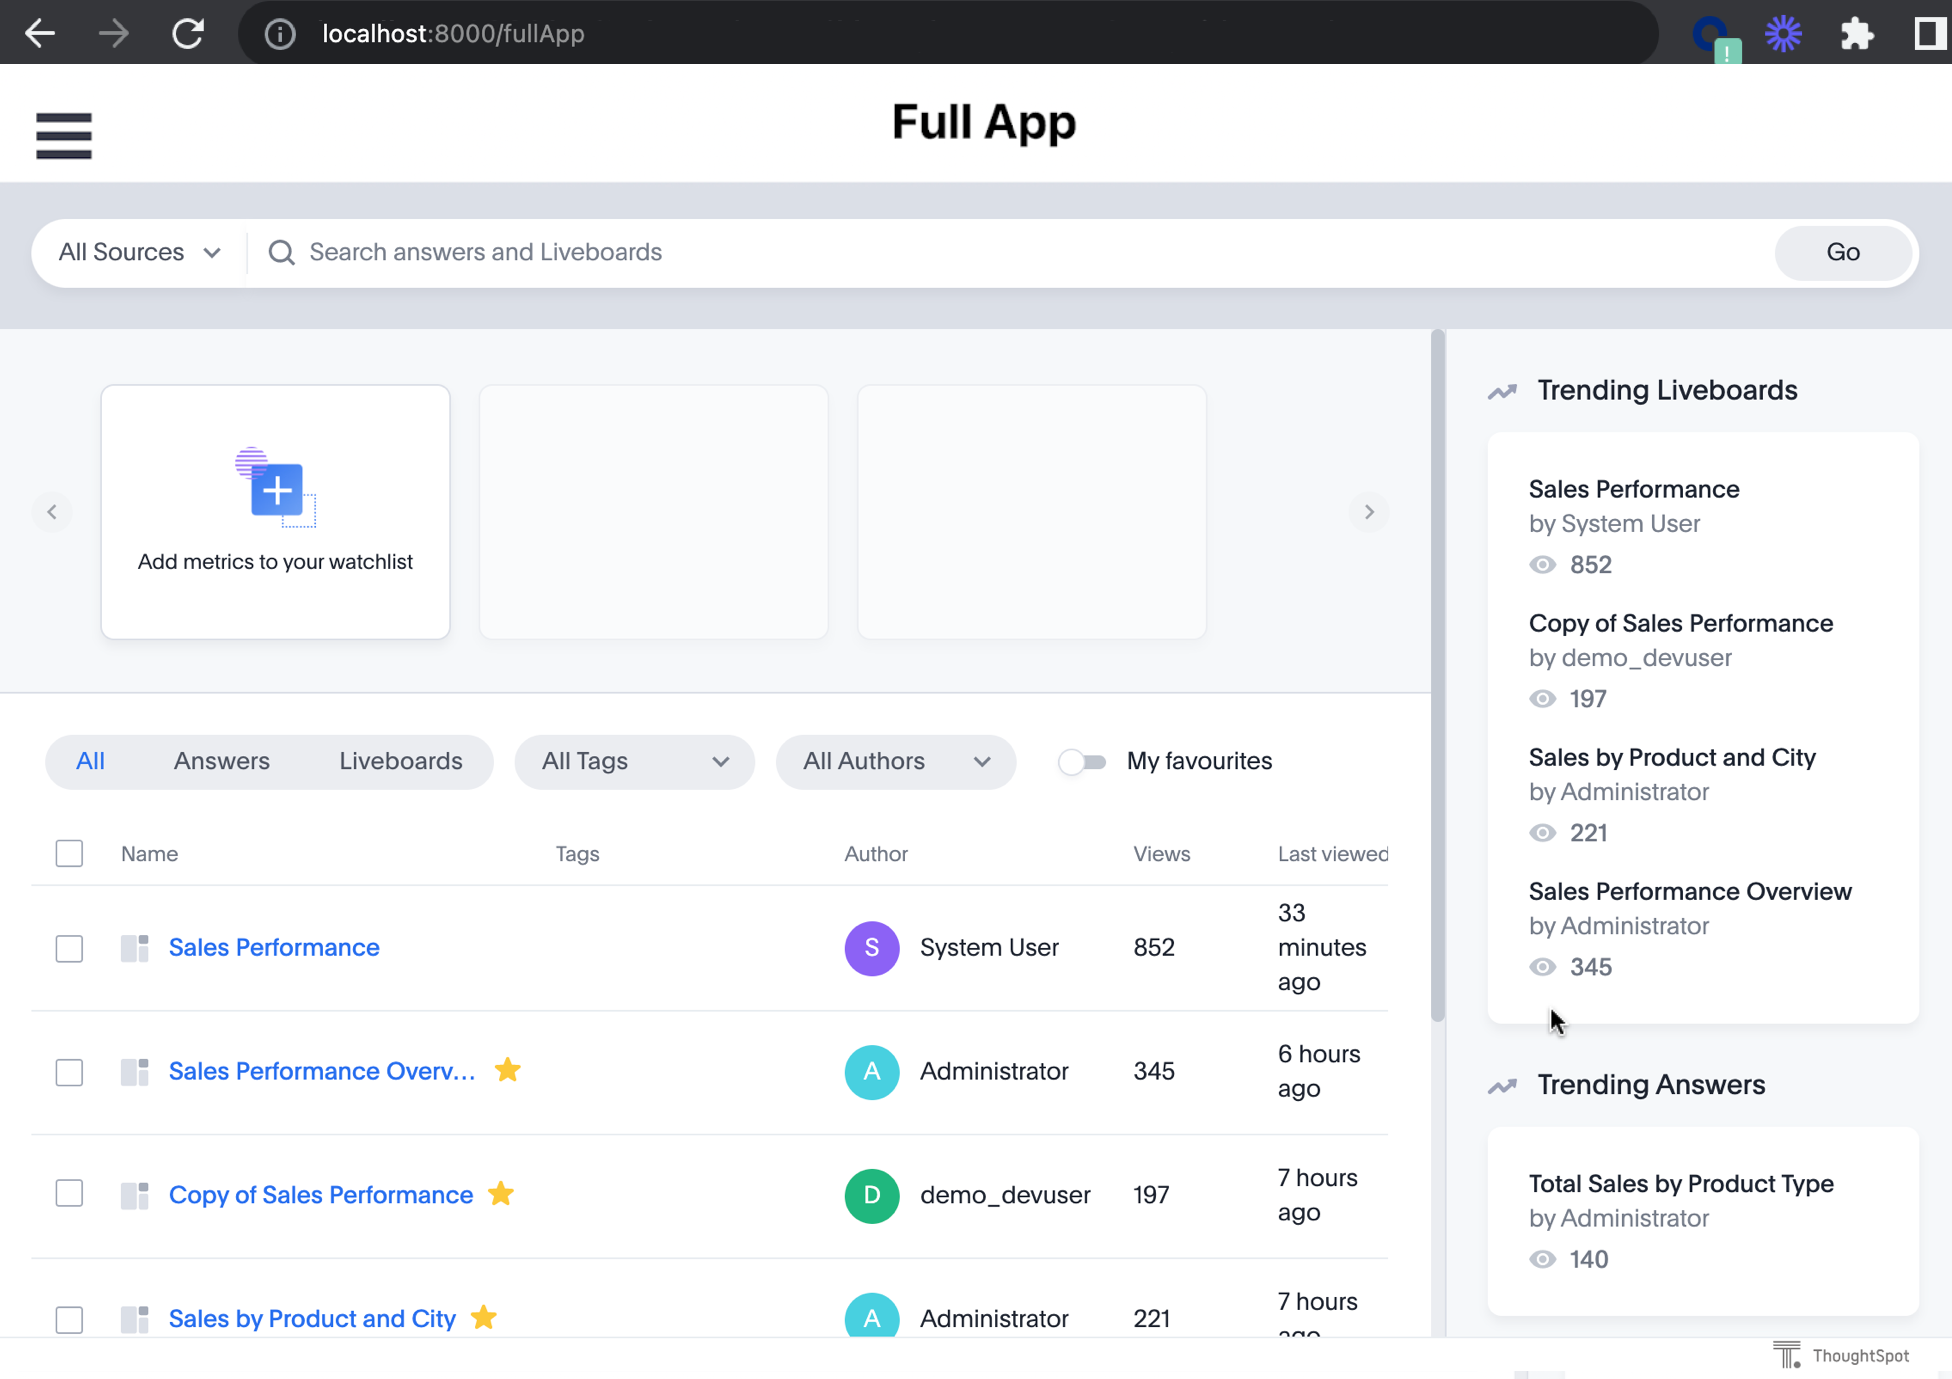
-
Check if the registered events are emitted.
Embed Spotter for conversation analytics🔗
To embed ThoughtSpot Spotter page with AI search experience and conversation analytics, use the SpotterEmbed component.
Create a Spotter component🔗
In your React app project:
-
Go to the Components folder in your app directory and add a page for the embedded search object; for example,
spotter.tsx. -
Import the
SpotterEmbedcomponent.import { AuthType, init, Action } from "@thoughtspot/visual-embed-sdk"; import { SpotterEmbed, useEmbedRef } from "@thoughtspot/visual-embed-sdk/react'";If you are using Webpack 4, import the React components as shown in this example:
import { SpotterEmbed, useEmbedRef } from '@thoughtspot/visual-embed-sdk/lib/src/react'; -
Initialize the SDK and specify the authentication method.
-
Add constructor options as props.
-
For Embed events, use the
on<EventName>convention. -
For Host events, use the
trigger(HostEvent.<EventName>)method.
-
-
Render the app.
ts-data-app> npm start
Code sample🔗
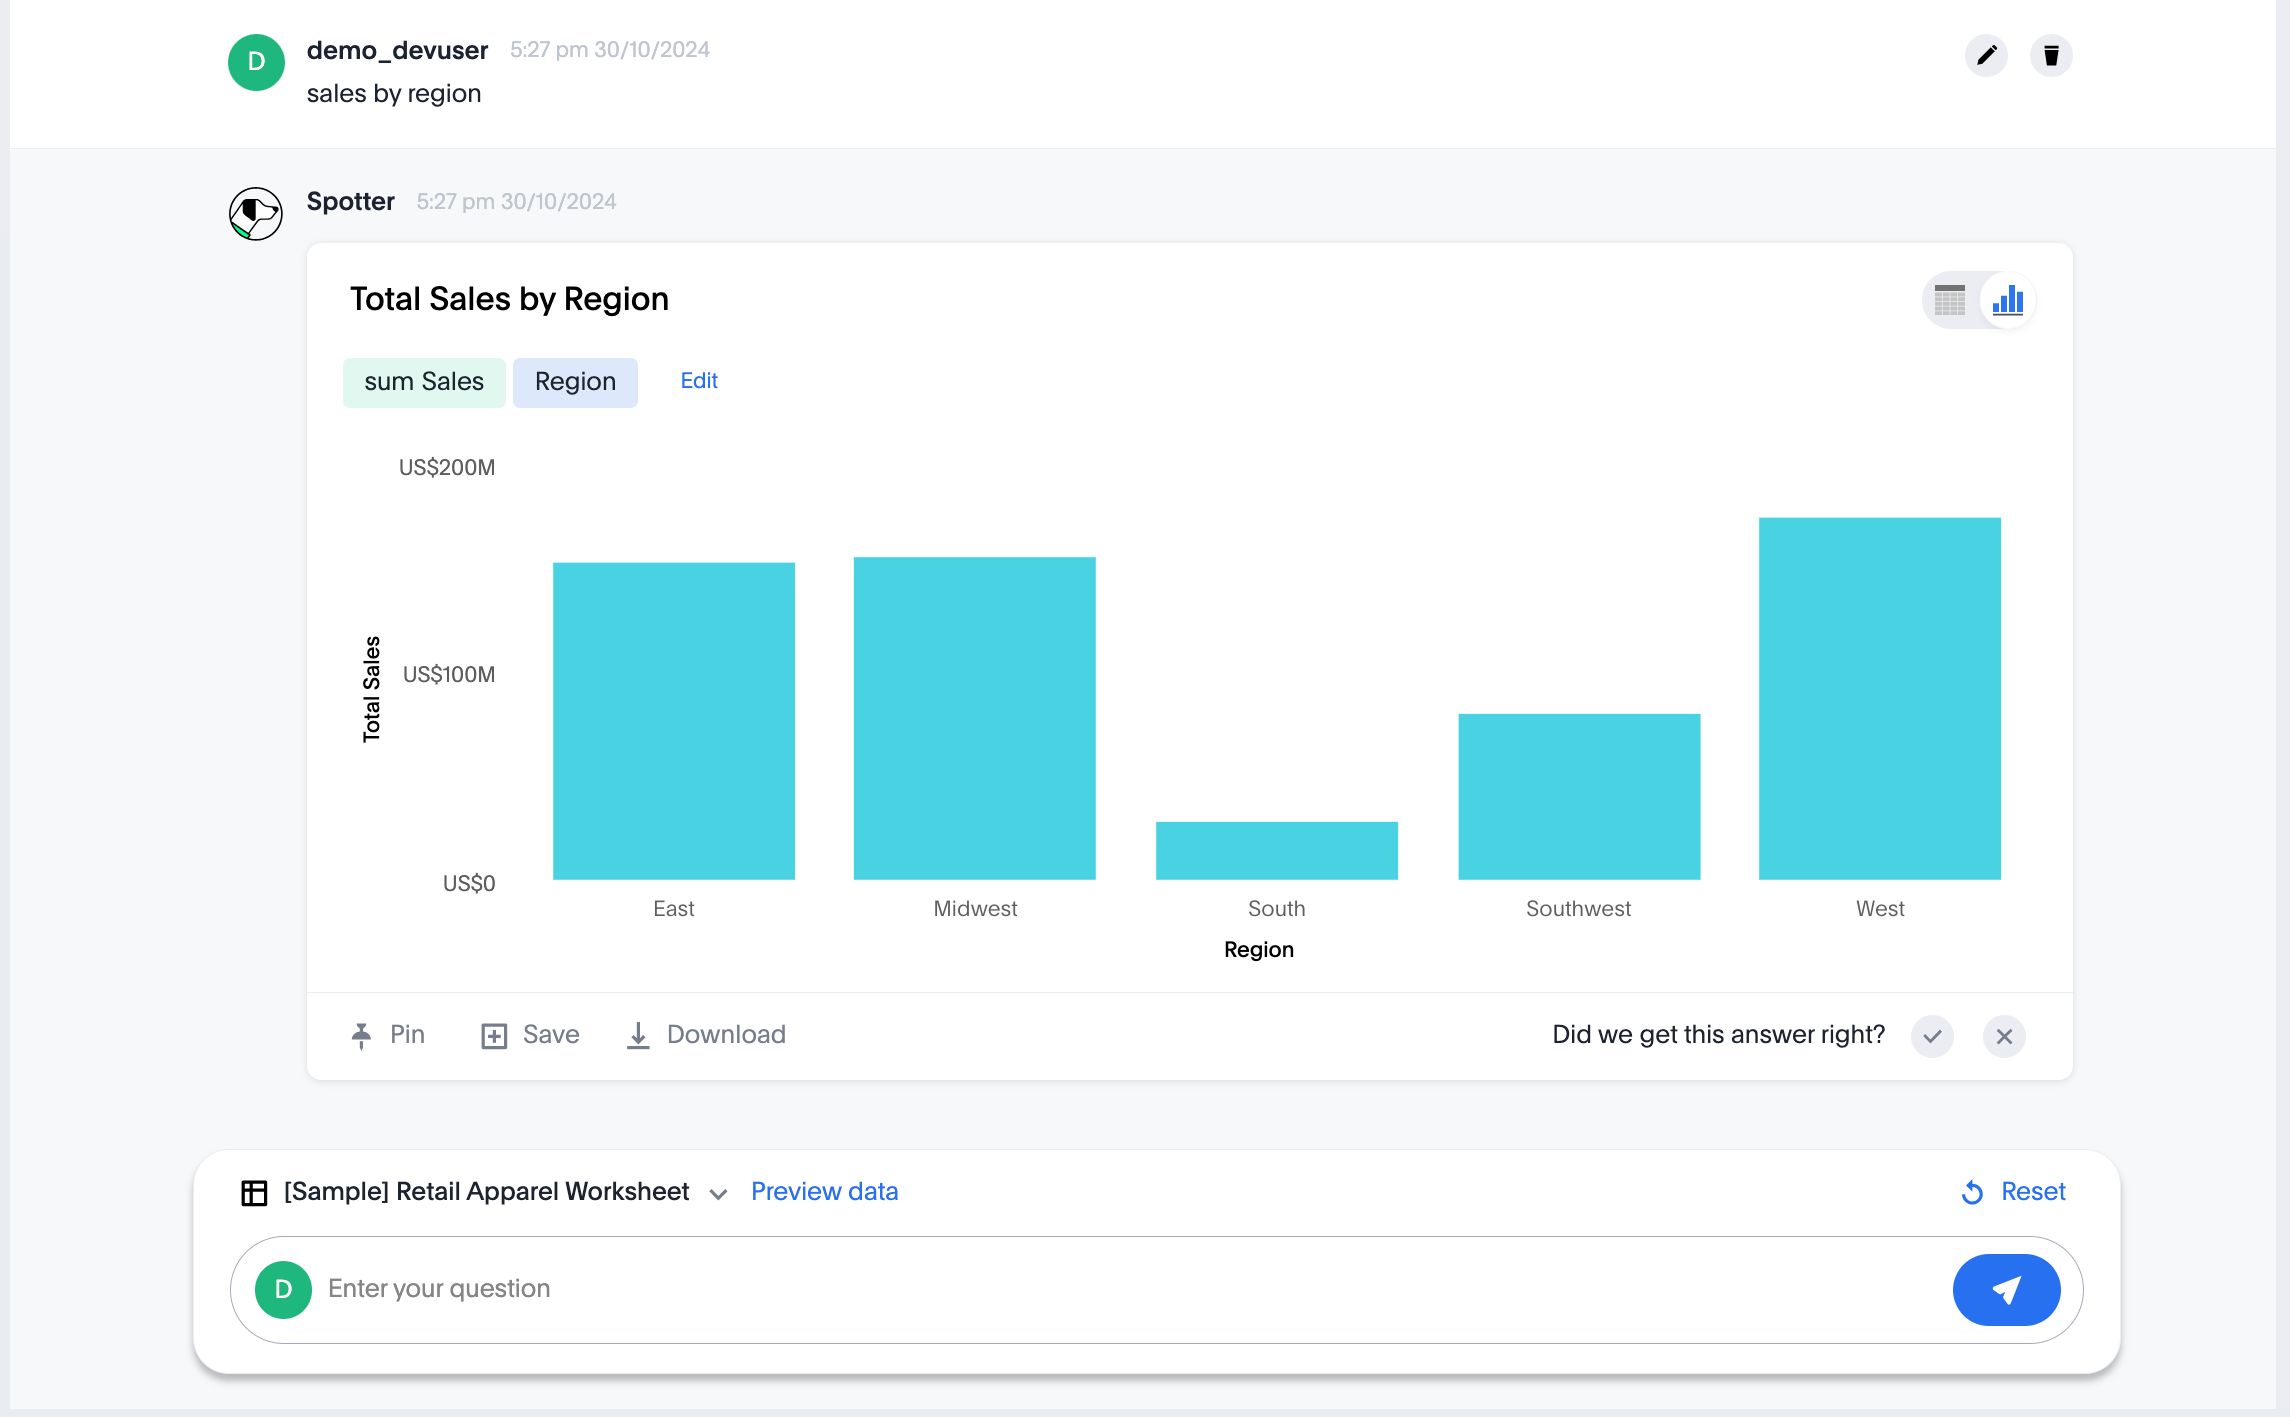
The following code sample shows the following attributes and properties:
-
A
SpotterEmbedfunction withworksheetIdprop to pass the ID of the data source object such as a Model.
Worksheets are deprecated and replaced by Models in ThoughtSpot Cloud 10.12.0.cl and later versions.
-
The
searchOptionsproperty to pass a search query string. -
Event handlers for
initandLoadEmbed events.import { AuthType, init, Action } from "@thoughtspot/visual-embed-sdk"; import { SpotterEmbed, useEmbedRef } from "@thoughtspot/visual-embed-sdk/react"; // If you are using Webpack 4 (which is the default when using create-react-app v4), you would need to import // the React components using the below: // import { SpotterEmbed } from "@thoughtspot/visual-embed-sdk/lib/src/react"; // Initialize ThoughtSpot init({ thoughtSpotHost: "https://your-thoughtspot-host", // Replace with your ThoughtSpot application URL authType: AuthType.None, // Use the appropriate AuthType for your setup }); const SpotterEmbed = () => { // Define search options const searchOptions = { searchQuery: "sales by region" // Search query to execute }; const worksheetId = "your-worksheet-id", // ID of the data source object (Model) to query data // Add Event handlers const onInit = () => { console.log(EmbedEvent.Init, {}); }; const onLoad = () => { console.log(EmbedEvent.Load, {}); }; return ( <SpotterEmbed frameParams={{ height: '720px' }} worksheetId={worksheetId} searchOptions={searchOptions} onLoad={onLoad} onInit={onInit} /> ); };
For more information, see the following pages:
Test your app🔗
-
Load your application.
-
Check if the Spotter component is rendered with the search query you specified.
Embed Spotter Agent in your own app🔗
To embed only the Spotter AI search component without additional features or Spotter page body in your app, use the SpotterAgentEmbed component.
Create a SpotterAgentEmbed component🔗
In your React app project:
-
Go to the **Components * folder in your app directory and add a page for the embedded search object; for example,
SpotterAgent.tsx. -
Import the
SpotterAgentEmbedcomponent anduseSpotterAgentReact hook.import React, { useState, useRef } from "react"; import { init, logout, AuthType } from "@thoughtspot/visual-embed-sdk"; import { useSpotterAgent, SpotterMessage, } from "@thoughtspot/visual-embed-sdk/react";
For Spotter Agent embedding, Visual Embed SDK provides the useSpotterAgent custom React hook, to manage your app interactions with the Spotter Agent embed component at the backend. You can use this hook to:
-
Provide a function to send the query and get the data back.
-
Provide a component to render the answer with the information received from the data query.
Initialize the SDK🔗
init({
    thoughtSpotHost: "https://your-thoughtspot-host", // Replace with your ThoughtSpot URL
    authType: AuthType.None, // Use the appropriate AuthType for your setup
});
Add constructors and props🔗
Create the Spotter Agent component using useSpotterAgent, and pass the data source ID. The code includes the following properties and functions:
-
worksheetId: The GUID of the data source to run queries on. -
sendMessage(query: string): Sends a natural language query to ThoughtSpot and returns a structured response.
const { sendMessage: sendSpotterMessage } = useSpotterAgent({
  worksheetId: "YOUR_MODEL_ID", // ID of the data source object (Model) to query data
});
const [response, setResponse] = useState<any | null>(null);
const handleSend = async () => {
  if (!input.trim()) return;
  const result = await sendSpotterMessage(input);
  setResponse(result.message);
  setInput("");
};
To render the visualizations generated by Spotter, pass the message data in the <SpotterMessage /> component.
<SpotterMessage
  message={response.message}
  style={{height: "600px", backgroundColor: "red" }}
/>
Render your app and load the embedded component:
ts-data-app> npm start
Code sample🔗
import React, { useState } from "react";
import { init, AuthType, logout } from "@thoughtspot/visual-embed-sdk";
import { useSpotterAgent, SpotterMessage } from "@thoughtspot/visual-embed-sdk/react";

// Initialize ThoughtSpot SDK
init({
  thoughtSpotHost: "https://your-thoughtspot-host", // Replace with your ThoughtSpot host
  authType: AuthType.None,
});

const worksheetId = "YOUR_DATA_MODEL_ID"; // Replace with your worksheet ID

const SpotterAgentComponent: React.FC = () => {
  const { sendMessage: sendSpotterMessage } = useSpotterAgent({ worksheetId });

  const [input, setInput] = useState("");
  const [response, setResponse] = useState<any | null>(null);

  const handleLogout = () => {
    logout();
  };

  const handleSend = async () => {
    if (!input.trim()) return;
    const result = await sendSpotterMessage(input);
    setResponse(result.message);
    setInput("");
  };

  return (
    <div className="app-container">
      {/* Header */}
      <div className="header">
        <h1>Spotter Agent app</h1>
        <button className="logout-btn" onClick={handleLogout}>
          Logout
        </button>
      </div>

      {/* Input and Response */}
      <div>
        <input
          type="text"
          value={input}
          onChange={(e) => setInput(e.target.value)}
          onKeyDown={(e) => e.key === "Enter" && handleSend()}
          placeholder="Ask something..."
        />
        <button onClick={handleSend}>Send</button>

        {response && (
          <div style={{ marginTop: "20px" }}>
            <SpotterMessage message={response} />
          </div>
        )}
      </div>
    </div>
  );
};

export default SpotterAgentComponent;
Test your app🔗
-
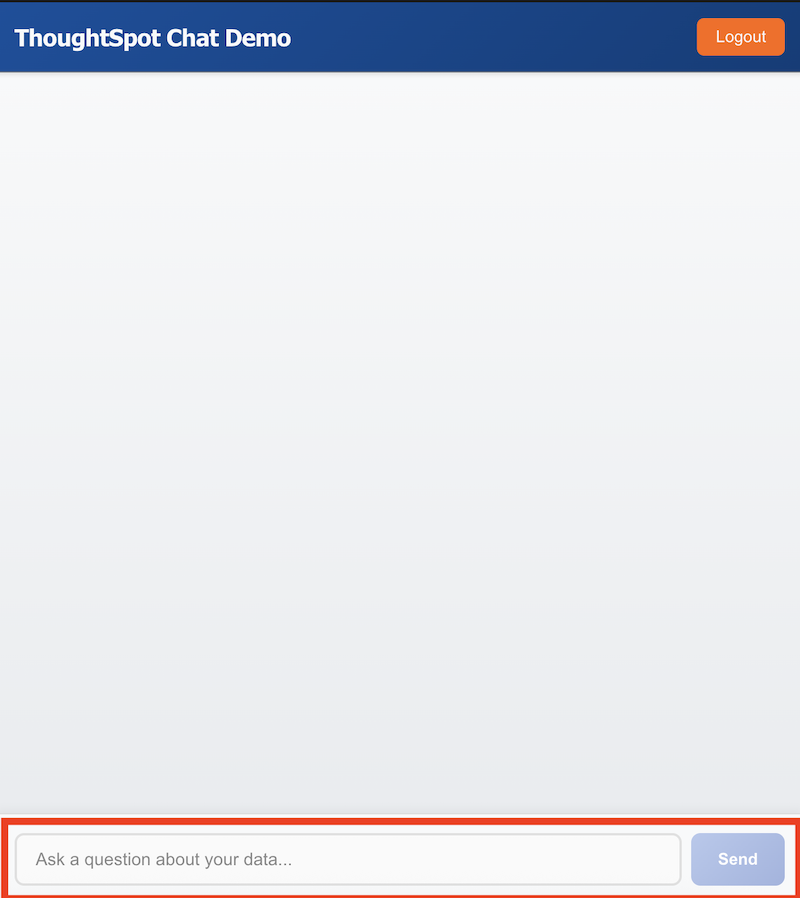
Load your application and verify if the page loads with the Spotter Agent Search component.
Embed token-based Search🔗
To embed ThoughtSpot Search page, complete the following steps:
Create a Search component🔗
In your React app project, go to the Components folder in your app directory and add a page for the embedded search object; for example, Search.tsx.
-
Import the
SearchEmbedcomponent and event librariesimport React from 'react' import { Action, AuthType, init, EmbedEvent, HostEvent } from '@thoughtspot/visual-embed-sdk'; import { SearchEmbed, useEmbedRef } from '@thoughtspot/visual-embed-sdk/react';If you are using Webpack 4, which is the default when using
create-react-app v4, import the React components as shown in this example:import { SearchEmbed, useEmbedRef } from '@thoughtspot/visual-embed-sdk/lib/src/react'; -
Initialize the SDK and specify the authentication method.
-
Add constructor options as props
-
Add event listeners:
-
For Embed events, use the
on<EventName>convention. -
For Host events, use the
trigger(HostEvent.<EventName>)method.For more information, see EmbedEvent and HostEvent.
-
-
Render the app.
ts-data-app> npm start
Code sample🔗
The following code sample shows additional attributes and properties:
-
A
Searchfunction with a data source ID. -
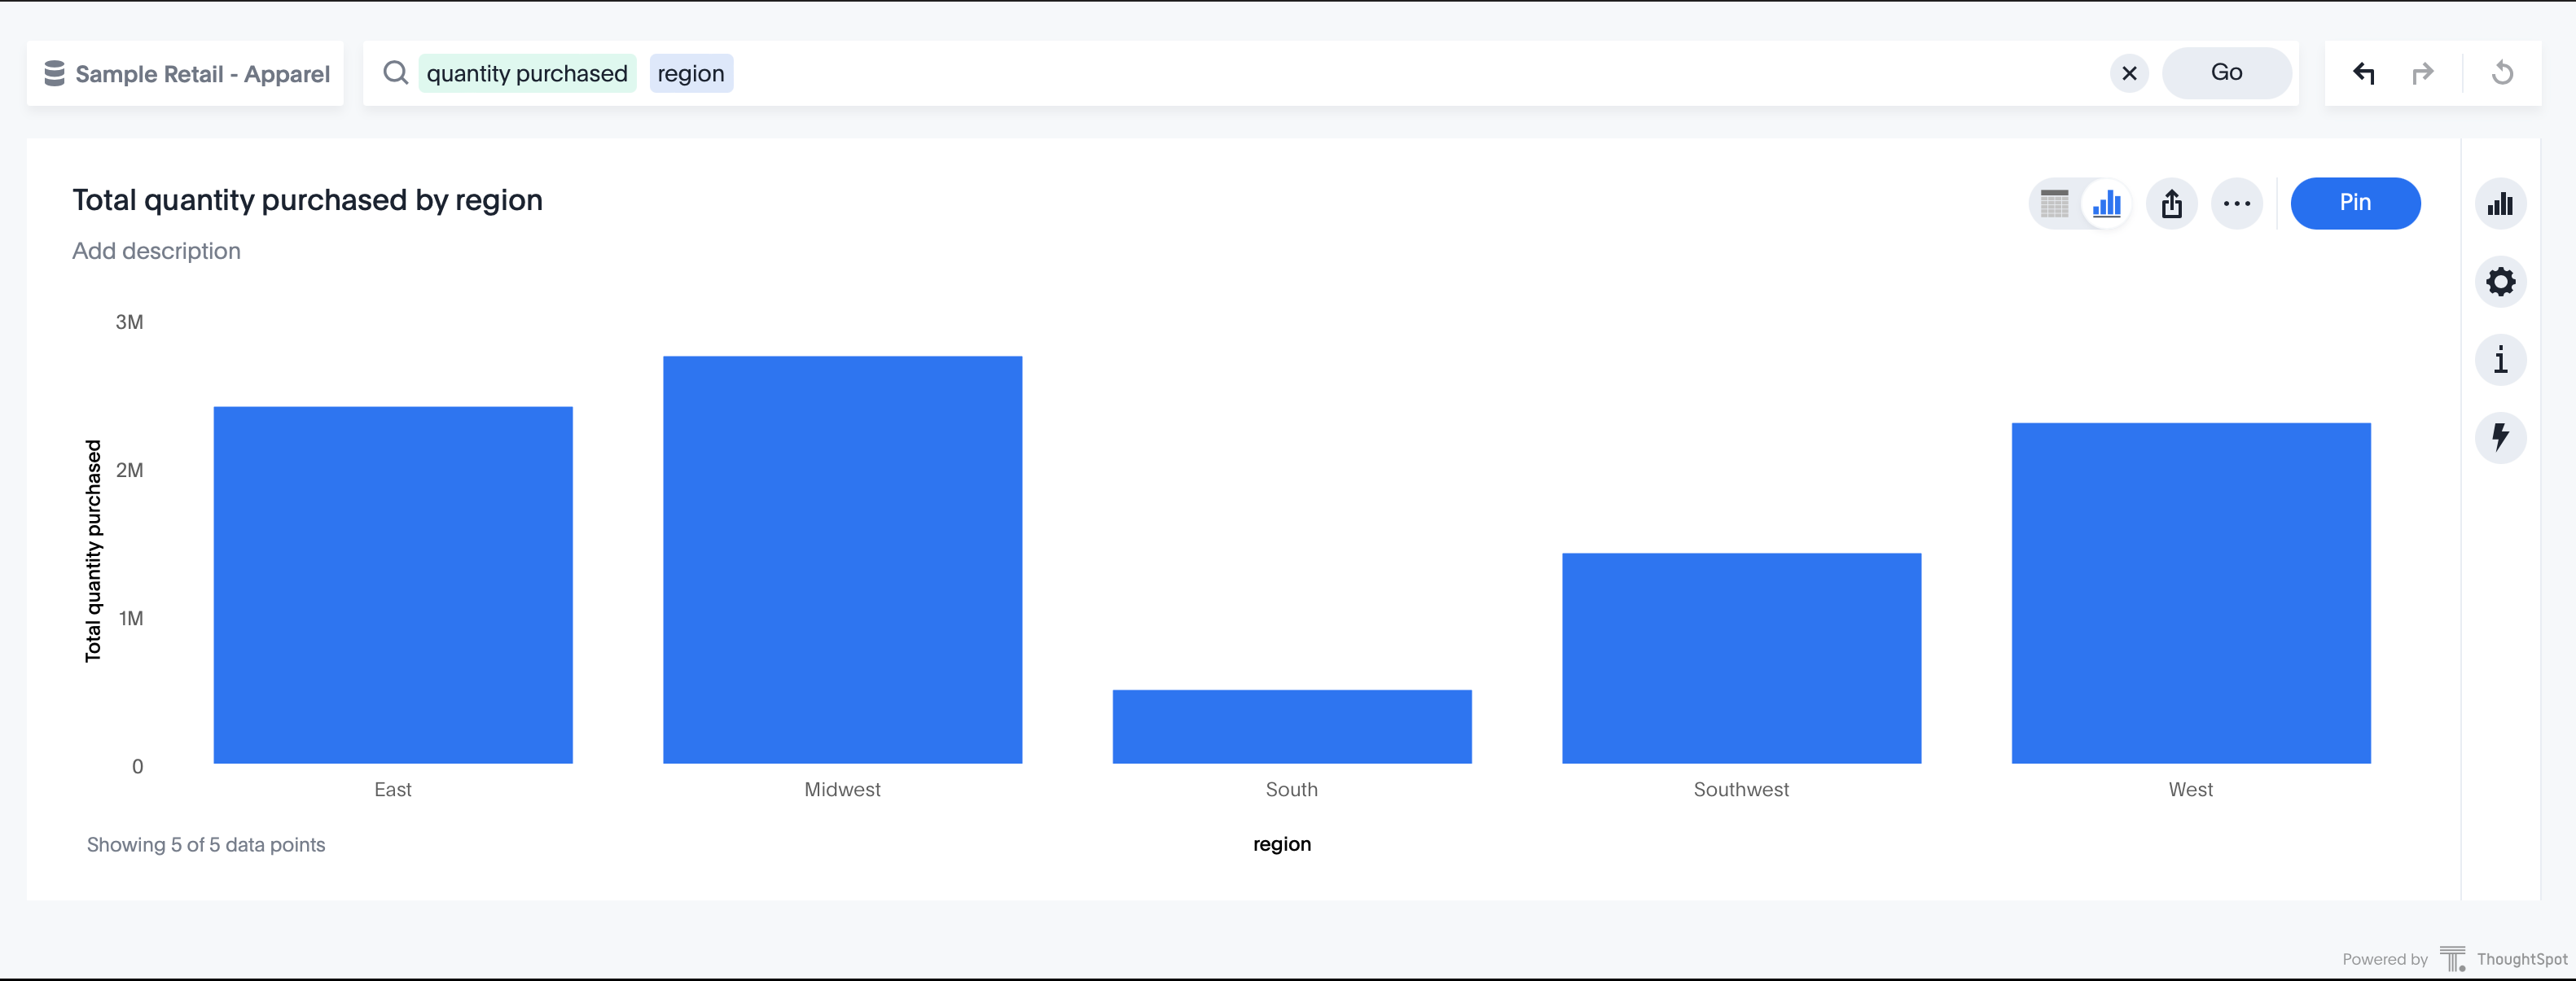
The
searchOptionsproperty to construct a query string with[quantity purchased] [region]keywords and execute the search query. -
Event handlers for
initand Load` events.import { init } from "@thoughtspot/visual-embed-sdk"; import { SearchEmbed } from "@thoughtspot/visual-embed-sdk/react"; // If you are using Webpack 4 (which is the default when using create-react-app v4), import // the React components using the below: // import { SearchEmbed } from "@thoughtspot/visual-embed-sdk/lib/src/react"; init({ thoughtSpotHost: "<%=tshost%>", authType: AuthType.None, }); const Search = () => { //To construct a search query and execute the search, define a search token string const searchOptions = { searchTokenString: "[quantity purchased] [region]", executeSearch: true, }; //add event handlers const onInit = () => { console.log(EmbedEvent.Init, {}); }; const onLoad = () => { console.log(EmbedEvent.Load, {}); }; return ( <SearchEmbed frameParams={{ height: 600, }} dataSource={["cd252e5c-b552-49a8-821d-3eadaa049cca"]} searchOptions={searchOptions} onLoad={onLoad} /> ); };
For more information about SearchEmbed objects and attributes, see the following pages:
Test your app🔗
-
Load your application.
-
Check if the ThoughtSpot search bar is rendered with the search tokens you specified.
Embed a Natural Language Search (Legacy interface)🔗
To embed ThoughtSpot Natural Language Search interface, complete the steps listed in the following sections.
Create a Natural Language Search component🔗
In your React app project:
-
Go to the Components folder in your app directory and add a page for the embedded search object; for example,
Sage.tsx. -
Import the
SageEmbedcomponent and event libraries.import { AuthType, init, EmbedEvent, HostEvent } from "@thoughtspot/visual-embed-sdk"; import { SageEmbed, useEmbedRef } from "@thoughtspot/visual-embed-sdk/react'";If you are using Webpack 4, import the React components as shown in this example:
import { SageEmbed, useEmbedRef } from '@thoughtspot/visual-embed-sdk/lib/src/react'; -
Initialize the SDK and specify the authentication method.
-
Add constructor options as props.
-
For Embed events, use the
on<EventName>convention. -
For Host events, use the
trigger(HostEvent.<EventName>)method.
-
-
Render the app.
ts-data-app> npm start
Code sample🔗
The following code sample shows additional attributes and properties:
-
A
Sagefunction with a data source ID. -
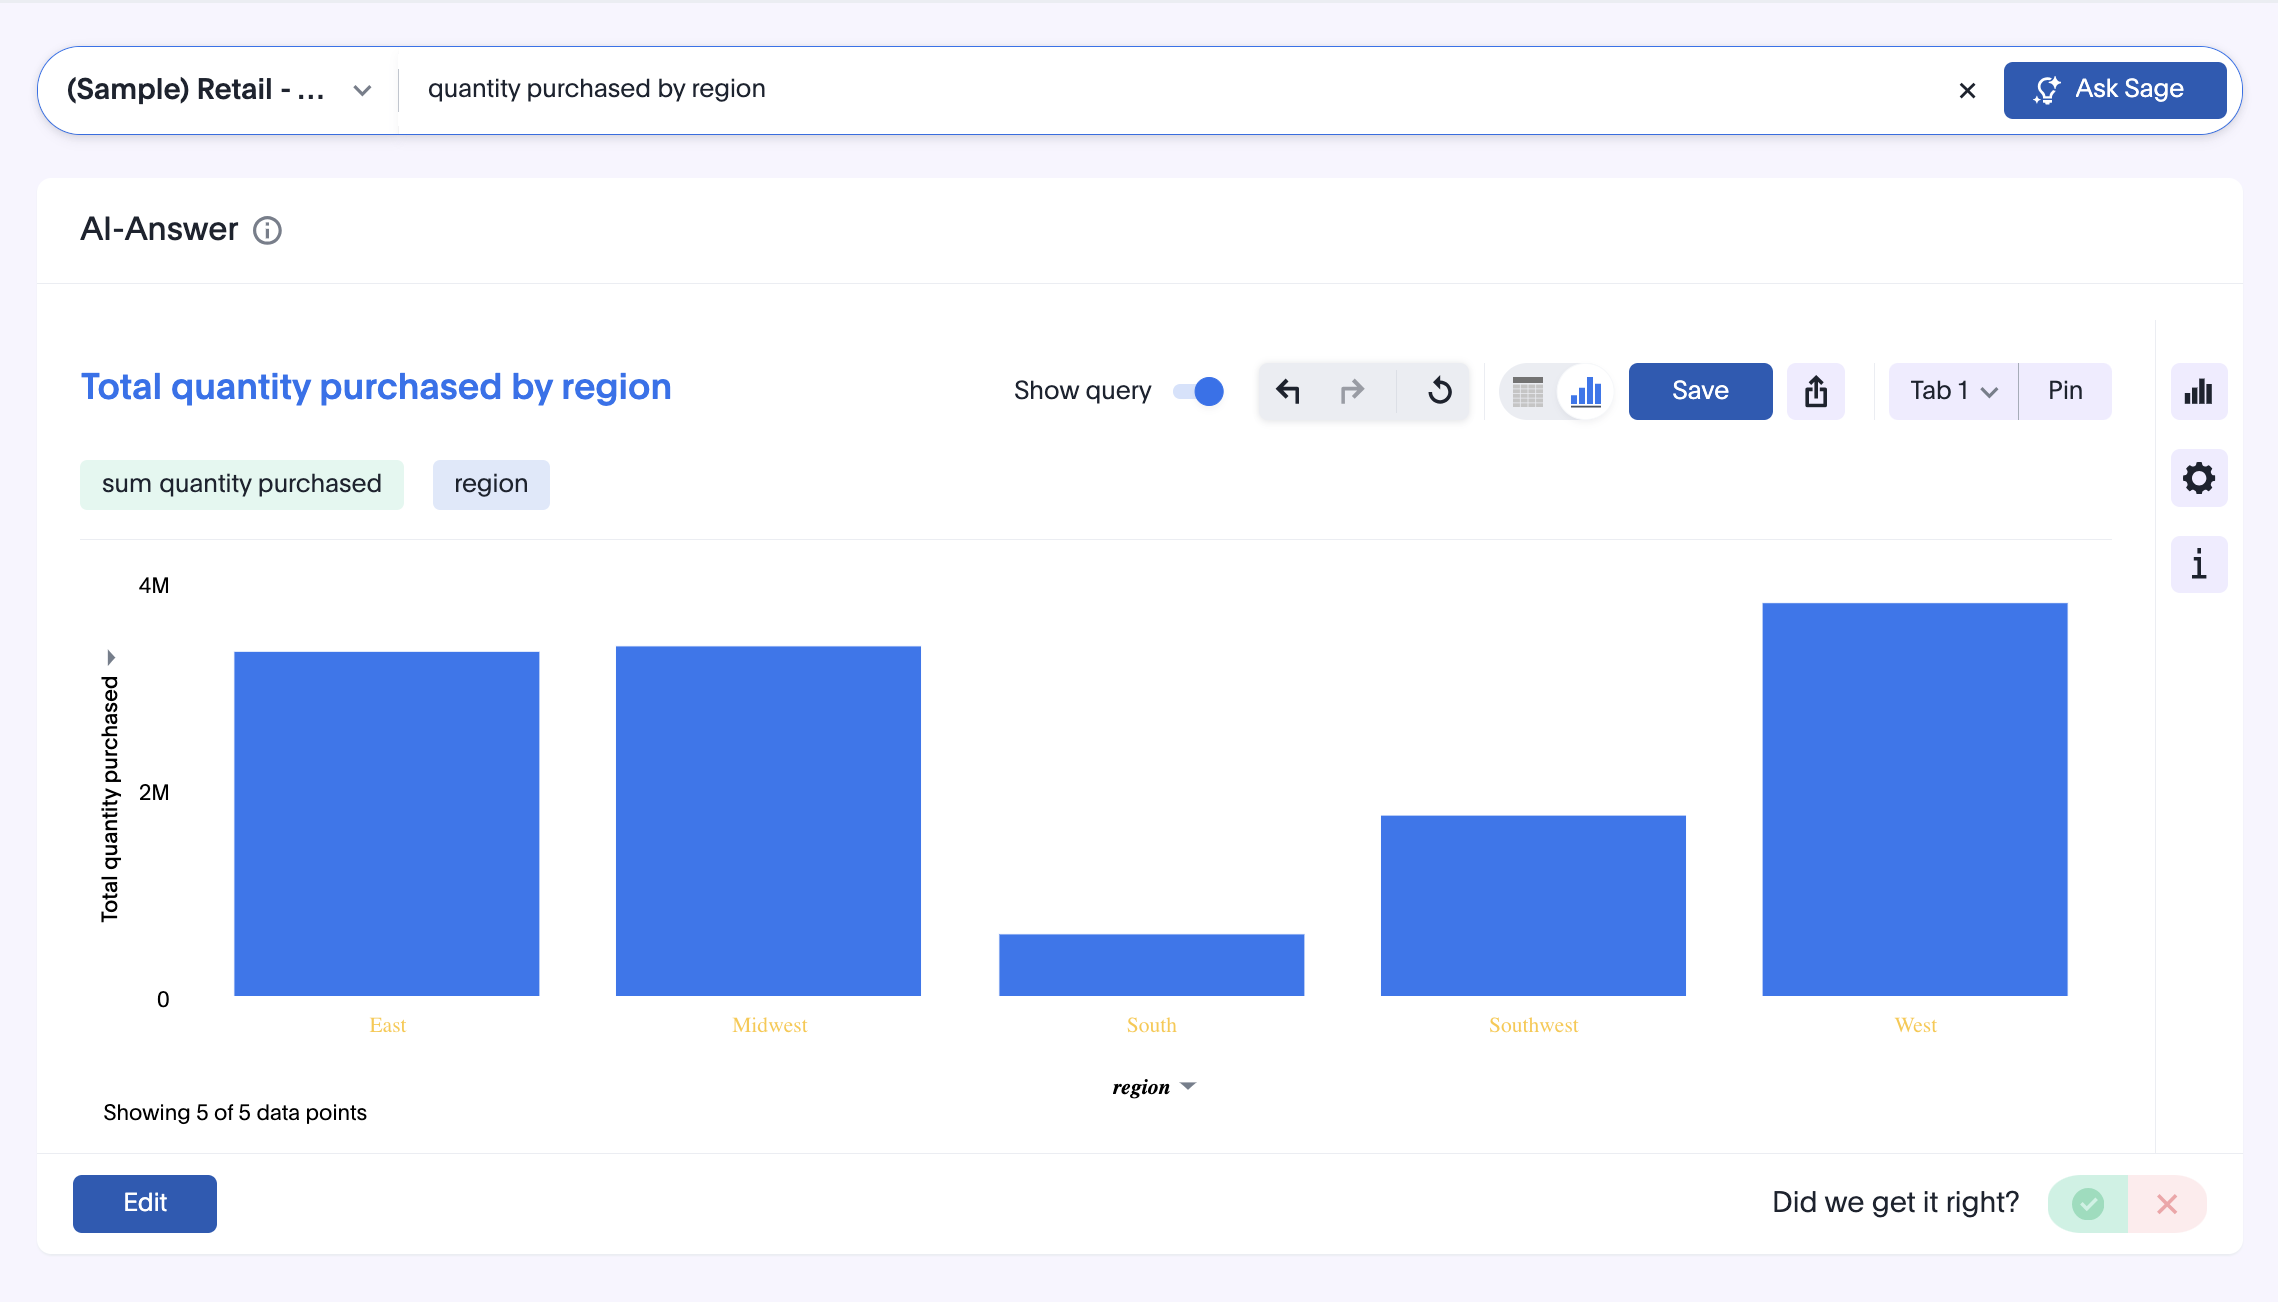
The
searchOptionsproperty to pass a search querynumber of jackets sold todayand execute the query. -
Event handlers for
initandLoadembed events.import { init, EmbedEvent, HostEvent } from "@thoughtspot/visual-embed-sdk"; import { SageEmbed } from "@thoughtspot/visual-embed-sdk/react"; // If you are using Webpack 4 (which is the default when using create-react-app v4), you would need to import // the React components using the below: // import { SageEmbed } from "@thoughtspot/visual-embed-sdk/lib/src/react"; // Initialize ThoughtSpot init({ thoughtSpotHost: "<%=tshost%>", authType: AuthType.None, }); const Sage = () => { // Define search options const searchOptions = { searchQuery: "number of jackets sold today", // Search query to execute executeSearch: true, // Execute search immediately }, dataSource: "c8684f7f-d8a4-4bc9-b87d-115433c5e458", // Replace with your actual data source }; // Add Event handlers const onInit = () => { console.log(EmbedEvent.Init, {}); }; const onLoad = () => { console.log(EmbedEvent.Load, {}); }; return ( <SageEmbed frameParams={{ height: 720px }} searchOptions={searchOptions} onLoad={onLoad} onInit={onInit} /> ); };
For more information about SageEmbed objects and attributes, see the following pages:
Test your app🔗
-
Load your application.
-
Check if the ThoughtSpot natural language search bar is rendered with the search query you specified.
Add routes for navigation🔗
If your app has multiple pages and you have created a new page for the embedded ThoughtSpot component, make sure you add a route in your app for navigation.
The following example shows a route for the Liveboard page.
import { Route, Routes} from "react-router-dom";
import { Liveboard } from './components/liveboard'
function App() {
 return (
   <div className="App">
     <Routes>
       <Route path="/" element={<h1>Home</h1>} />
       <Route path="/liveboard" element={<Liveboard />} />
       <Route path="/about" element={<About />} />
     </Routes>
   </div>
 );
}
export default App;