 authType: AuthType.Basic,
 username: TSUserName,
password:'<your password>',Integrate ThoughtSpot with Vercel
Table of Contents
If you are using Vercel to deploy and maintain your application, you can integrate your Vercel project with your ThoughtSpot application instance and easily embed ThoughtSpot content in your app. With Vercel integration, you can connect your application to ThoughtSpot data, create content for analytics, and embed it in your app.
Before you begin🔗
Vercel integration requires the following setup:
-
A Vercel account to which you want to install the integration
-
A Vercel project that can access the integration
-
ThoughtSpot application URL.
You can use your ThoughtSpot Host URL or the free trial URL. -
Your user account has Can manage Data privilege.
-
To implement Trusted authentication for embedding application users,
secret_keyis required.
Thesecret_keyis generated ifTrusted authenticationis enabled on your instance.
For more information, see Secret key management.NoteTo set up Trusted authentication for Vercel integration,
Can administer ThoughtSpot(administrator) privilege is required. Note that ThoughtSpot Developer Edition does not offer Trusted Authentication. Users upgrading from Free Trial to Developer Edition may have to change the code samples slightly to use Basic authentication in the sample applications.For example, in
App.jsorApp.tsx, replaceAuthType.TrustedAuthTokenwithAuthType.Basicas shown here:
Get started with Vercel integration🔗
Vercel integration with ThoughtSpot includes the following steps:
Step 1: Install integration🔗
To install integration:
-
Log in to Vercel.
-
Go to https://vercel.com/integrations/thoughtspot-analytics.
-
Click Add Integration.
-
In the Install ThoughtSpot pop-up, add the following details:
-
Select the Vercel account in which you want to install the ThoughtSpot integration
-
Select the Vercel project that you want to connect to ThoughtSpot application
-
-
Click Install. The following screen appears.
-
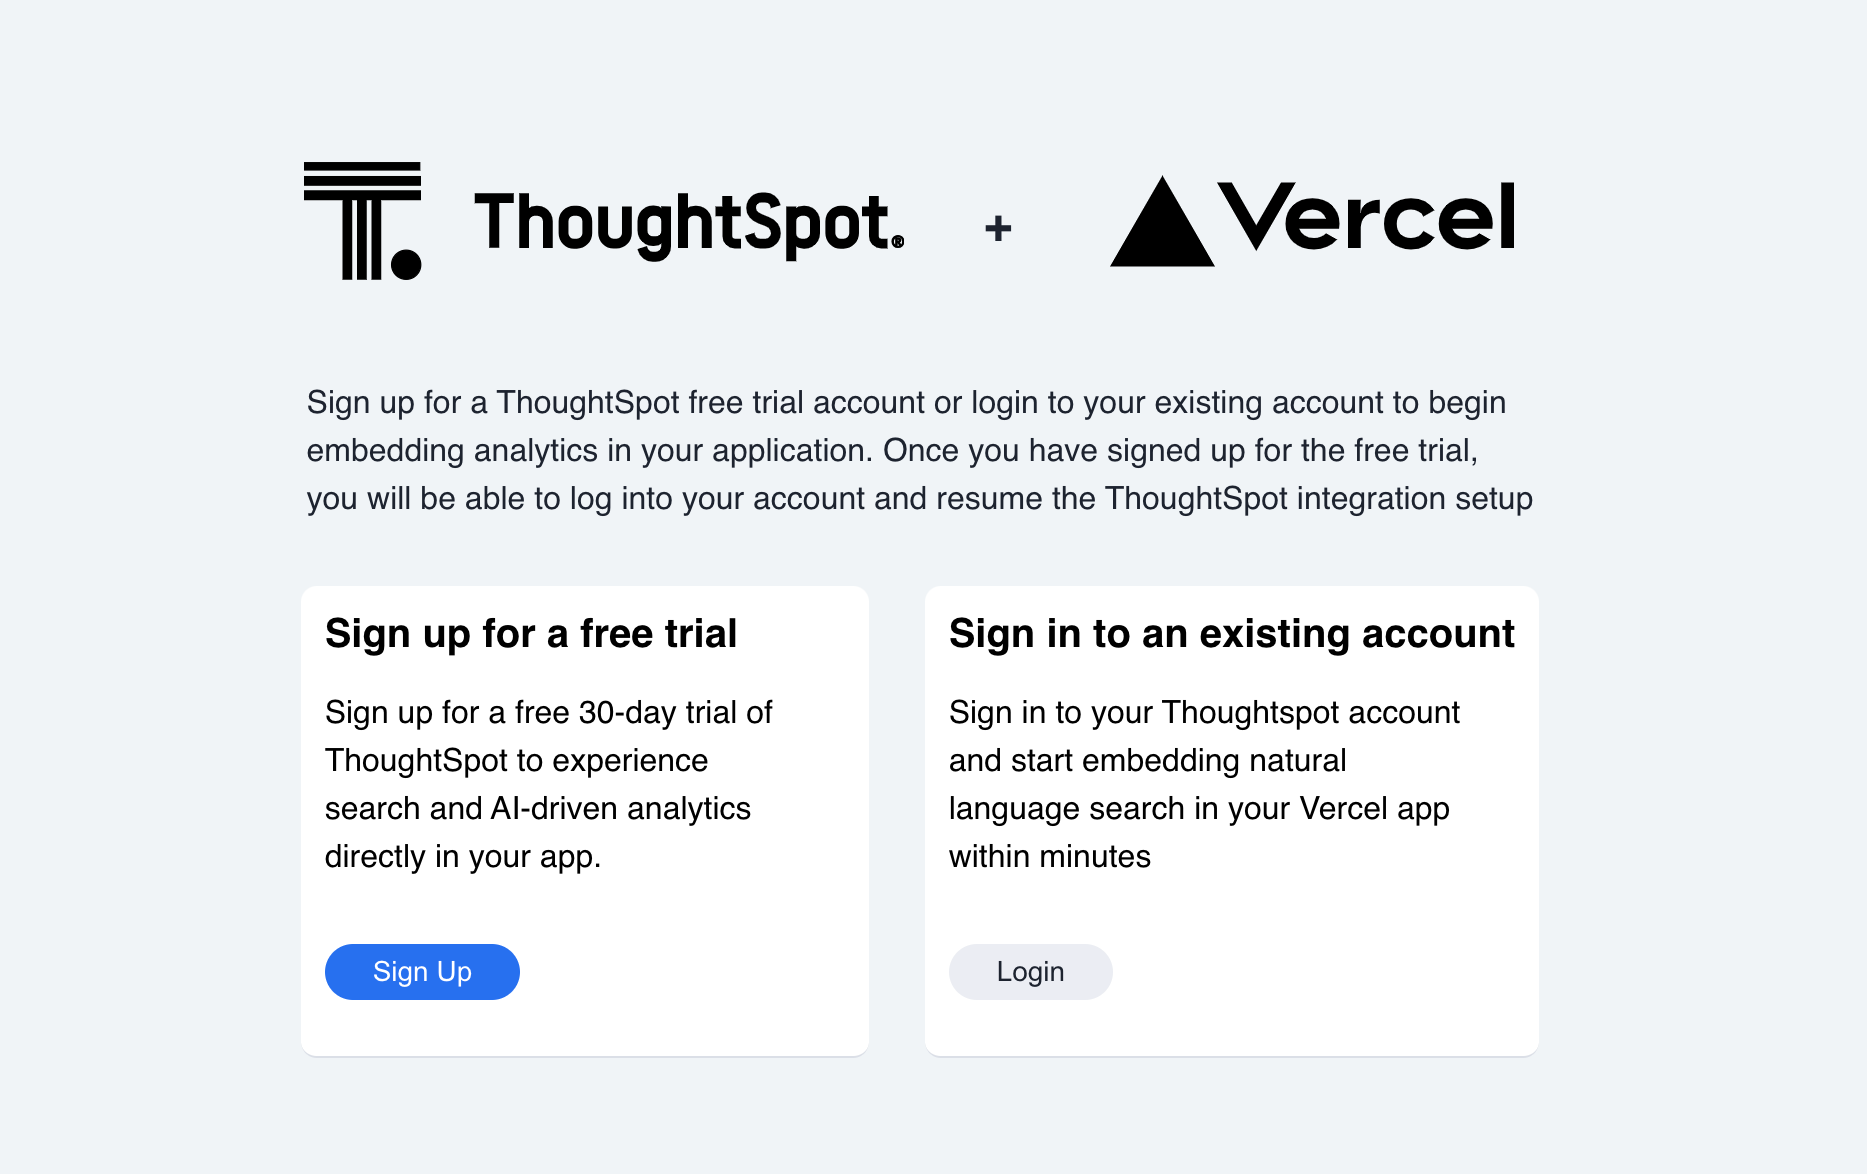
Do one of the following:
-
If you have a ThoughtSpot application instance, click Login.
-
If you don’t have an application instance, click Sign up to sign up for a free trial and log in to the free trial instance.
-
-
Enter the URL of your ThoughtSpot instance. For example,
https://{ThoughtSpot-hostname}.thoughtspot.cloud.
You can copy the URL from the address bar of Web browser, or from the account activation emails sent to your registered email address by ThoughtSpot. For more information, see FAQs. -
Click Continue.
-
Log in to your ThoughtSpot application instance with your credentials.
For SSO authentication, click Sign in with SSO and complete the authentication.
After you sign in, connect your Vercel project to ThoughtSpot data.
Step 2: Connect to ThoughtSpot data🔗
To continue with integration, check if your Vercel project is integrated with Postgres.
-
If Postgres is not integrated or if you don’t want to use Postgres, clear the Use Postgres connection from the project if available checkbox and proceed to create a Connection.
-
If Postgres is integrated, ThoughtSpot will automatically create a connection to the existing Postgres databases in your project.
With Postgres, you can either use an existing Model available on your instance or create a Model instantaneously.
Models in ThoughtSpot refer to logical representation of data and are used to model complex datasets. For more information, see ThoughtSpot Product Documentation.
-
To analyze data from an existing Model, click Connect to existing Worksheets.
-
To create a connection and Model, click Create a new connection.
-
Add Tables and Columns and click Update connection.
ThoughtSpot automatically detects joins between the selected Tables.
-
Select the association of tables you would like to run your analysis on, and then click Continue.
ThoughtSpot will create a Model with the data set you selected.
-
Click Continue.
-
-
Step 3: View the embed code🔗
After you connect your Vercel project to ThoughtSpot data, test and preview your embedding. The integration displays the code snippet for embedding Natural Language Search. You can also navigate to the Stackblitz code sandbox and preview the results.
Note that at this point, the embed code doesn’t have the authentication type defined. ThoughtSpot supports several authentication options such as SAML, OIDC, and Passthrough authentication to match your deployment preferences.
-
If you don’t want to set up authentication for your application users, click Exit Setup. ,
-
If you want to set up Trusted authentication, ensure that your user account has
Can administer ThoughtSpotprivilege, and then click Next.
Step 4: Set up authentication🔗
ThoughtSpot recommends using the Trusted authentication method to seamlessly authenticate your application users and access ThoughtSpot content in your app.
-
To set up Trusted authentication, ensure that you have the following information:
-
TS_HOST
URL of your ThoughtSpot application instance. -
TS_SECRET_KEY
If Trusted authentication is enabled on your ThoughtSpot application instance, a secret key is generated. Administrators can view this secret key on the Develop > Customizations > Security Settings page. For more information, see Secret key management.
-
-
If you don’t have the authentication service, click Deploy Auth Service to deploy using the Trusted authentication template.
The Vercel project configuration page opens. -
Add the values for
TS_HOSTandTS_SECRET_KEYunder environment variables. -
Click Deploy.
Step 5: Test the embed code🔗
After Vercel deploys your application, the sample code in the integration page is updated with the authentication properties that you just configured.
-
To test and preview the embed code in the Stackblitz code sandbox, click Try in StackBlitz.
You can also copy the code and use it in your embedding application. -
After verifying the code, click Next.
-
Review the integration summary.
The summary page provides the following options:-
Use the sample code generated in the previous step and embed ThoughtSpot content in your app. If you have set up Trusted Authentication, the page displays the details of the authentication setup.
-
If you don’t have an app to embed ThoughtSpot content, you can deploy a demo app in Vercel and view the embedded content.
-
Navigate to your ThoughtSpot application instance.
-
-
To complete the installation, click Finish Setup.
-
To view the integration details at any time:
-
Log in to your Vercel account.
-
Go to the Vercel project in which the ThoughtSpot integration is installed.
-
Click Manage.
The ThoughtSpot integration page appears.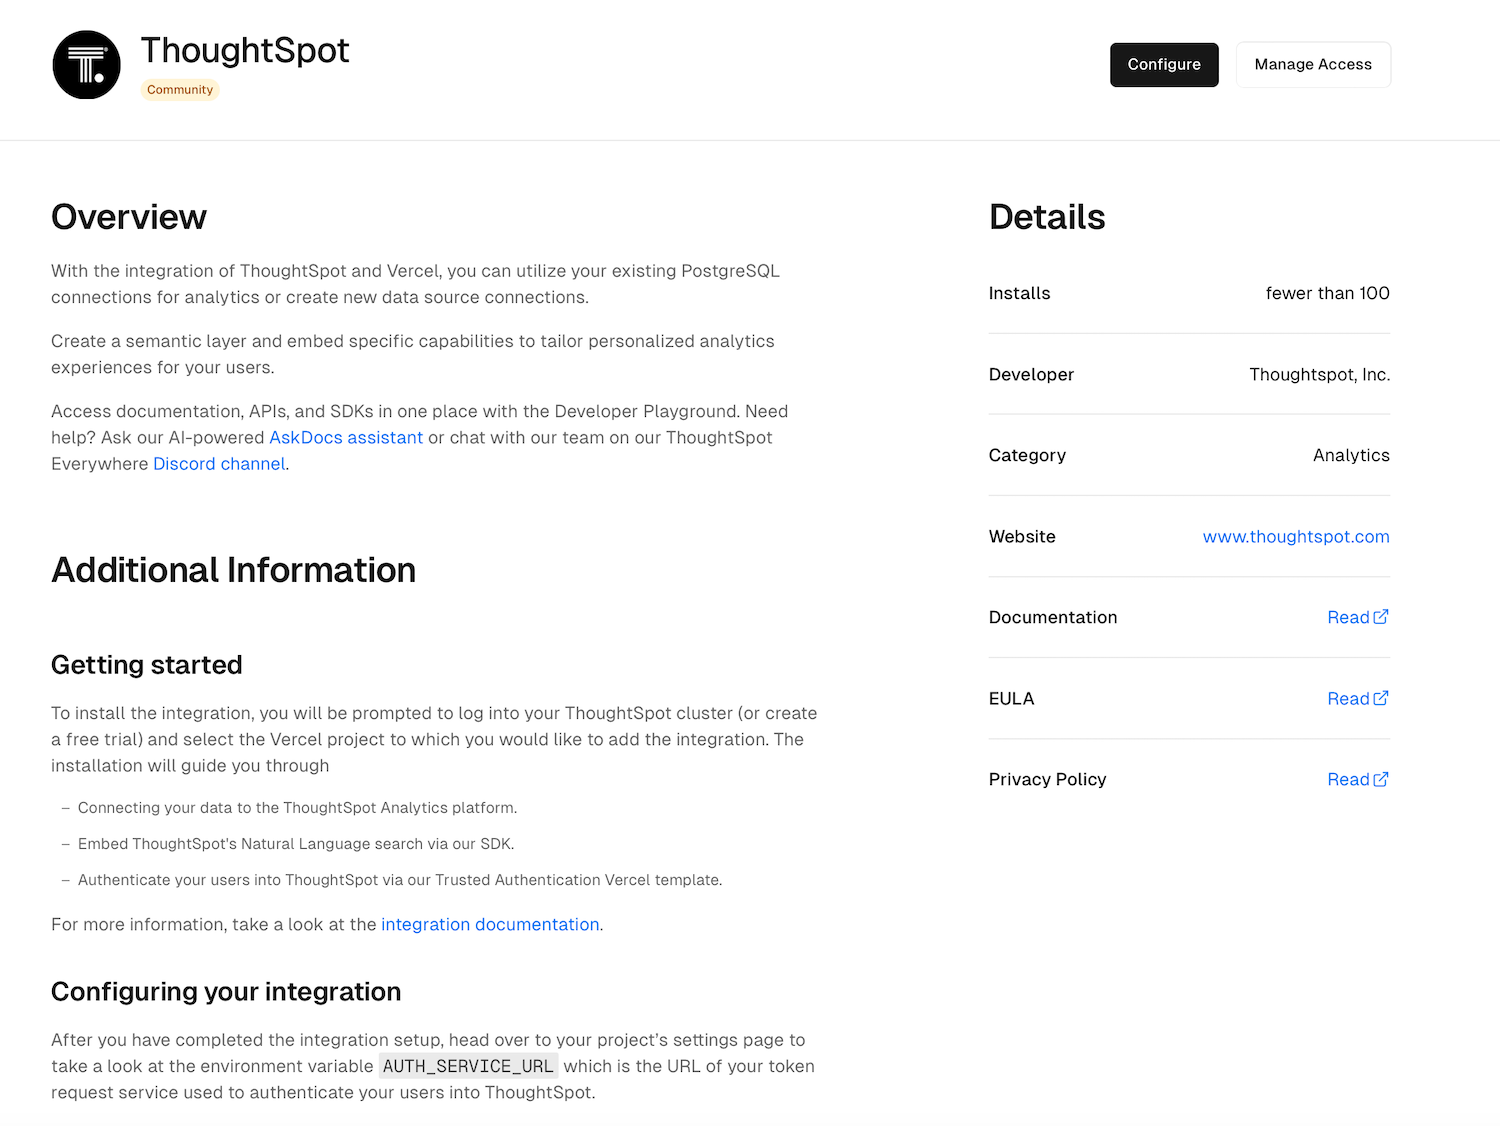
-
To view the integration details, click Configure.
-
To install ThoughtSpot integration in another Vercel project, click Manage and add the project.
-
Deploy ThoughtSpot demo app in Vercel
If you don’t have the application setup to embed ThoughtSpot content, you can use the ThoughtSpot demo app. The demo app allows you to load data and view embedded content.
To deploy the demo app:
-
In the ThoughtSpot integration summary page, click Don’t have an application? Deploy the ThoughtSpot Demo App.
The environment variables required to set up the demo app are displayed. Copy the variable values. -
Click Deploy Demo App.
-
In the Vercel app deployment page, go to Configure Project > Required Environment Variables.
-
Add the values copied from the Vercel integration page.
-
Click Deploy.
-
After the app is deployed, click the app to view the embedded pages in the demo app.
Remove integration🔗
To remove ThoughtSpot integration from your Vercel project:
-
Go to the Vercel project in which the ThoughtSpot integration is installed.
-
Click Manage. The ThoughtSpot integration page opens.
-
Scroll down to the Uninstall section and click Remove Integration.