Integrate Spotter into your chatbot
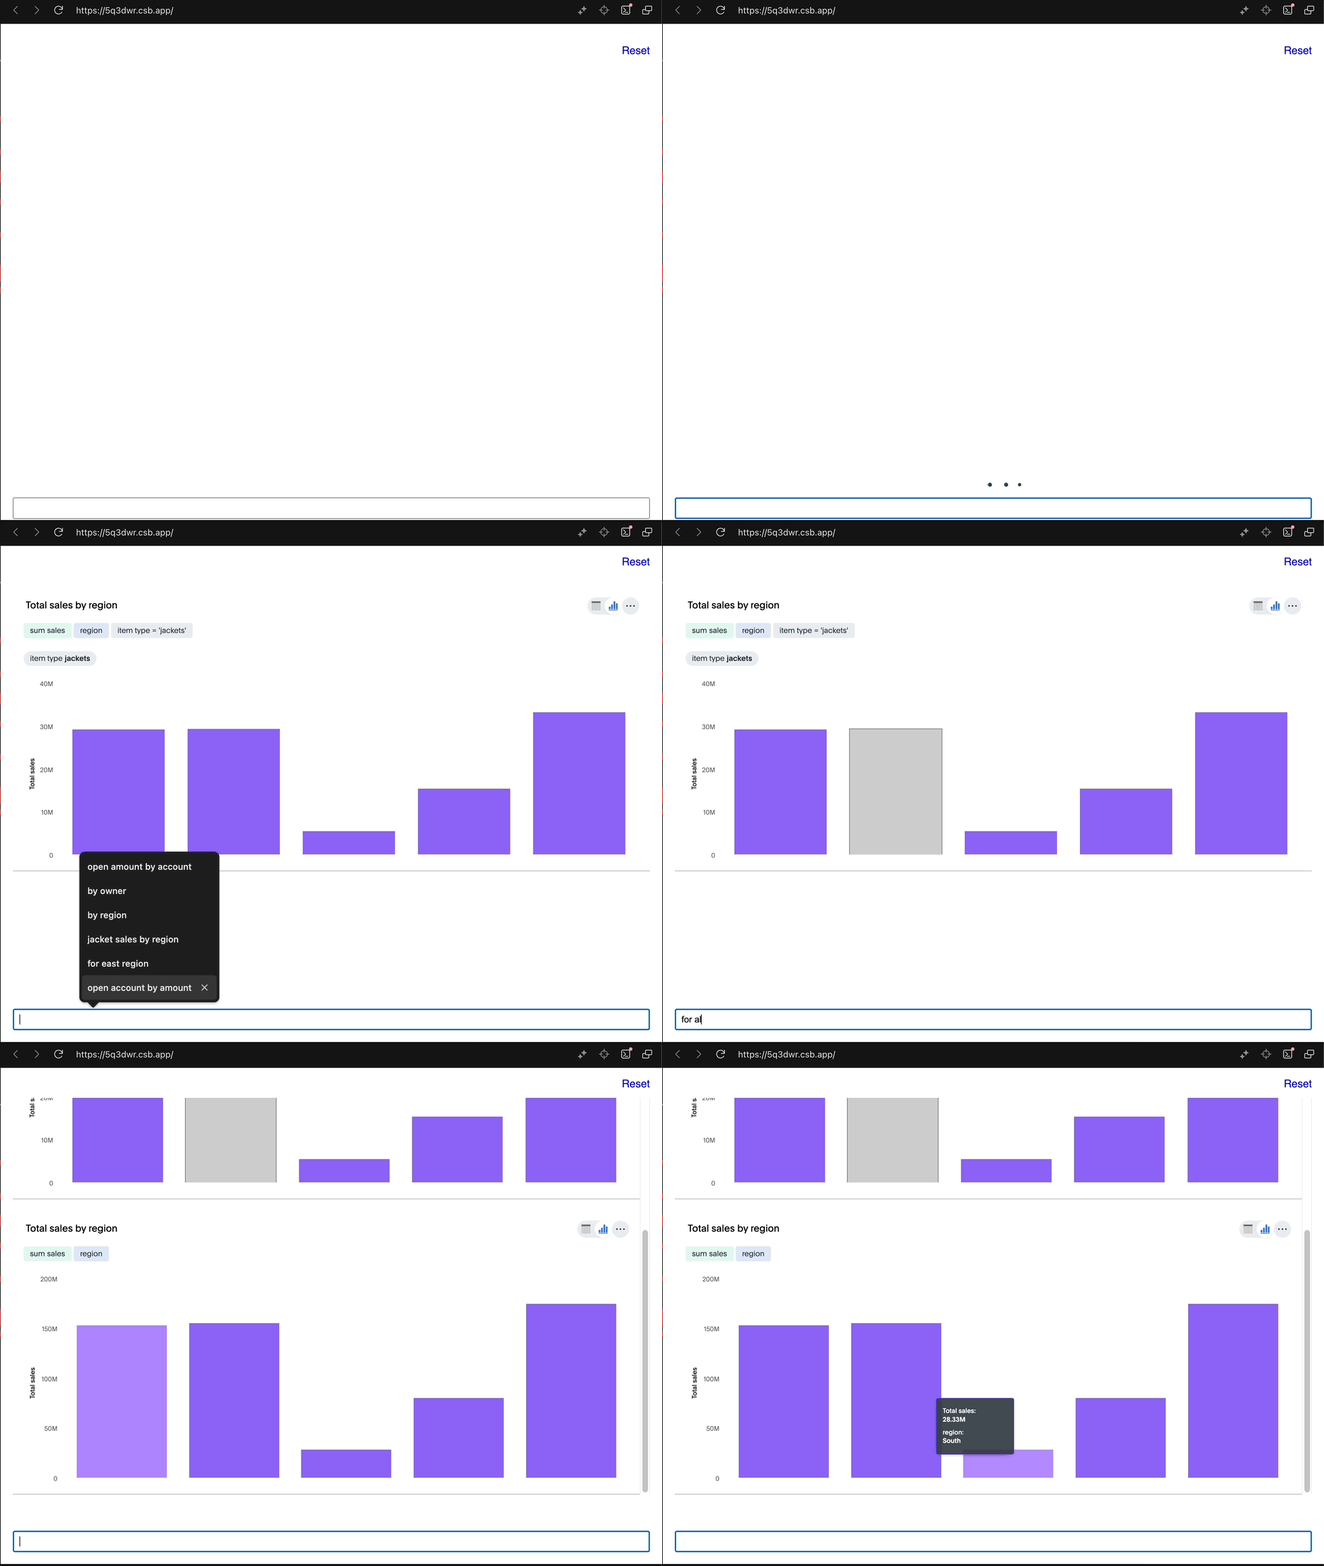
In this article, we’ll use ThoughtSpot’s Visual Embed SDK to add analytics and interactive data visualizations to your own chatbot. To view the full code used in this tutorial, visit our CodeSandbox.

Install Visual Embed SDK🔗
$ npm i @thoughtspot/visual-embed-sdk
Configure security and authentication🔗
-
Add the URL of the host application, which embeds ThoughtSpot visualizations, to the CSP allowlist. This includes adding the correct CORS and frame-ancestors CSP.
For more information, see Security settings.
-
Configure the authentication scheme that works best for your use case.
Read the Authentication documentation and choose the scheme that best suits your implementation.
In this tutorial, we’ll use
AuthType.None. We assume you are logged into your ThoughtSpot instance in a different browser tab.
Get the data model🔗
Make sure you have already connected your database and created a ThoughtSpot data model. Log into your instance to get the id of the data model you want to use.
For this tutorial, we’ll use the demo Thoughtspot instance with a sample data model.
Initialize the SDK🔗
import {
  SpotterAgentEmbed,
  init,
  AuthType,
} from "@thoughtspot/visual-embed-sdk";

init({
  thoughtSpotHost: "https://<your-instance>.thoughtspot.cloud",
  authType: AuthType.None, // Or your authentication scheme.
});
Create a conversation🔗
To use the Spotter conversational analytics, let’s start by creating a new conversation. This conversation holds the context of all messages sent to ThoughtSpot by your bot. This enables a truly conversational experience for your chatbot users.
const conversation = new SpotterAgentEmbed({
    // Specify the GUID of the data source object
    worksheetId: "<data-model-id>",
  });
Send messages and get interactive visualizations in response🔗
After creating a conversation, we’ll use it to send messages to the ThoughtSpot Spotter AI. Spotter evaluates and generates data on your data model, and returns a visualization in response.
// Get the response from ThoughtSpot Spotter
const { container } = await conversation.sendMessage(message);

// Create a new DOM element, to host the visualization returned above.
const div = document.createElement("div");

// Add any styling you might want to this element.
div.classList.add("viz");
// Add the container of the visualization as contents to this dom element.
div.append(container);
// insert the DOM into your application.
app.insertAdjacentElement("beforeend", div);
That’s all!🔗
And that’s a wrap! This was a super quick tutorial on how to use Spotter embed APIs to integrate conversational analytics with your chatbot! Visit the CodeSandbox to see it in action in a sample chatbot we created.
Here is the complete code used in this tutorial:
import {
  SpotterAgentEmbed,
  init,
  AuthType,
} from "@thoughtspot/visual-embed-sdk";

init({
  thoughtSpotHost: "https://try-everywhere.thoughtspot.cloud",
  authType: AuthType.None,
});

const app = document.getElementById("app");
const input = document.getElementById("input");
const loader = document.getElementById("loader");
const reset = document.getElementById("reset");

let conversation;

function initConversation() {
  conversation = new SpotterAgentEmbed({
    worksheetId: "cd252e5c-b552-49a8-821d-3eadaa049cca",
  });
  app?.innerHTML = "";
}
initConversation();

async function sendMessage(message) {
  const viz = await conversation.sendMessage(message);
  const div = document.createElement("div");
  div.classList.add("viz");
  div.append(viz.container);
  app.insertAdjacentElement("beforeend", div);
  div.scrollIntoView({
    behavior: "smooth",
  });
}

input.addEventListener("keydown", async (e) => {
  console.log(e.key);
  if (e.key !== "Enter") {
    return;
  }

  loader?.style.visibility = "visible";
  const message = input.value;
  input.value = "";
  await sendMessage(message);
  loader?.style.visibility = "hidden";
});

reset?.addEventListener("click", (e) => {
  initConversation();
});