Embed search into your app using the ThoughtSpot SDK
1. Overview
This QuickStart tutorial shows you how to create a simple HTML application that embeds ThoughtSpot’s search capabilities. In this tutorial you will:
- Initialize a connection to ThoughtSpot
- Embed Search with a pre-picked data source
- Hide and disable features of search
Time to complete: 10 minutes
2. Requirements
To successfully complete this QuickStart you will need:
- A modern web browser, such as Google Chrome
- A simple web server
- A text editor or IDE for editing web code
- A ThoughtSpot Everywhere free trial account
- ThoughtSpot data and worksheet that you can use for Search
A simple web server can be started by running python3 -m http.server 8000 on the command line from a folder containing your web application code (e.g. index.html).
3. Source Templates
You can find initial templates to get started at https://github.com/thoughtspot/ts_everywhere_resources/tree/master/embed_template
This template includes the following files:
4. Create an HTML file
- index.html - HTML for the embedding application
- tse.css - sample style sheet used for this QuickStart
- tse.js - starting JavaScript file for embedding ThoughtSpot
- tse-final.js - example of the completed JavaScript for this exercise
An initial index.html file has been provided to start with. You can create your own, but it must include a div element to insert the embedded object into and the imports of the JavaScript files.
An example of the div element is:
<div id=’embed’></div>
There is no specific id value that is required, but it should be unique and needs to be referenced in the embed code with the same name.
The includes for the JavaScript are:
<script src='https://unpkg.com/@thoughtspot/visual-embed-sdk/dist/tsembed.js'></script>
<script src='tse.js' type='module'></script>
The first script is for the ThoughtSpot SDK. The second is your specific JavaScript code that will embed ThoughtSpot.
5. Initialize the Connection to ThoughtSpot
Before you can embed, you have to initialize the ThoughtSpot SDK with code like the following. In this case, we are using AuthType.None, which will require you to log in. There are more secure options, such as SSO. See the documentation for more details on Authentication.
In the tse.js file, add the following to the tsInit() function:
 init({
    thoughtSpotHost: tsURL,
    authType: AuthType.None,
  });
6. Embed search
You will need data and a worksheet as mentioned in the Requirements section.
You use a two-step process for embedding all objects. First, you create the embed object and then you render it. By breaking this into two steps you could create a set of objects and just call render based on user activity.
First, create the embed component and then call render(). In the onSearch() function in tse.js add the following code:
const embed = new SearchEmbed('#embed', {
 frameParams: {},
});

embed.render();
You can also specify the datasource to use in the embed parameters. Providing initial data sources can make it easier for your users since they don’t have to select a datasource.
dataSources: ["cd252e5c-b552-49a8-821d-3eadaa049cca"]
The easiest way to get the datasource ID is to use the Developer Playground using the following steps:
- Click the Develop tab in ThoughtSpot
- Select Search under Playground
- Select the datasource from the dropdown list
- You will see a line for the dataSources get added
- If you click Run, you will see Search update with the chosen source already selected
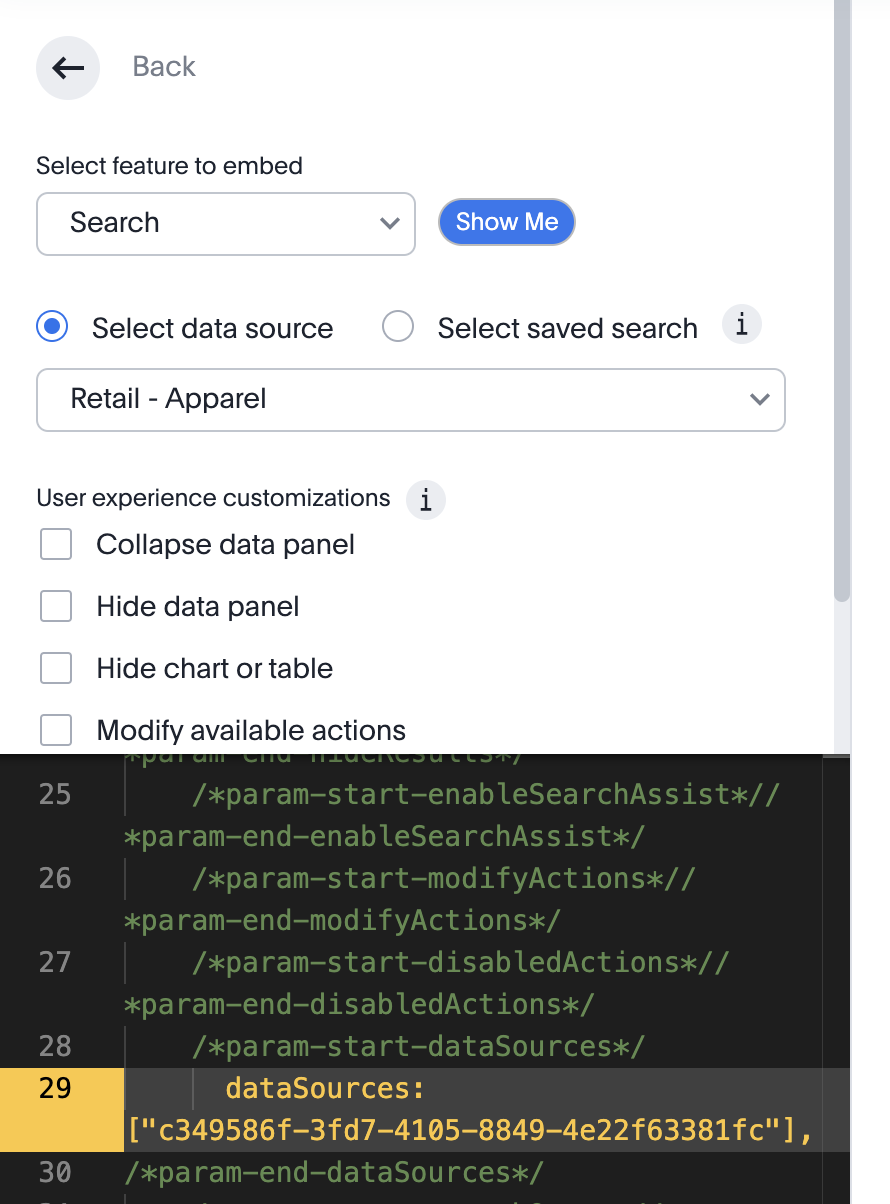
If you add the dataSource, the new code looks like the following (with your ID):
const embed = new SearchEmbed('#embed', {
 frameParams: {},
 dataSources: ["c349586f-3fd7-4105-8849-4e22f63381fc"],
});
Now if you select the Search option, you should see something like the following:
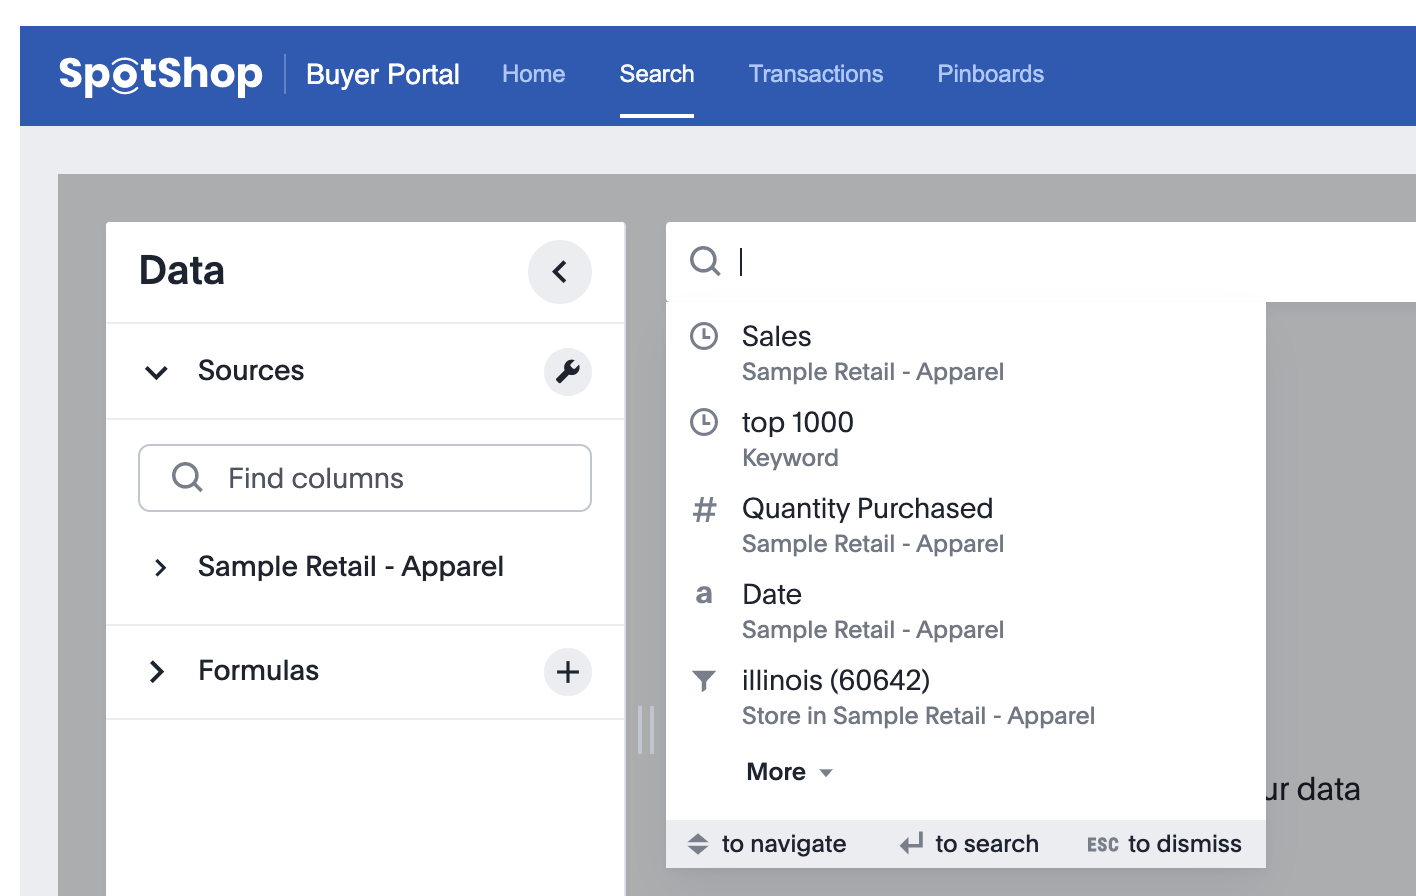
Note that your search suggestions, sources, etc. will differ.
7. Hiding and Disabling Features
The previous step showed embedding with the default functionality. However, it’s often desired to give customers access to only some features or provide enhanced functionality based on licensing or other rules. In this section, you will disable and hide different features. Not all actions are covered here. See the ThoughtSpot documentation for the available options.
All embedding options have three attributes you can set:
disabledActions: [Action.??],
disabledActionReason: '<reason for disable>’,
hiddenActions: [Action.??, Action.??],
- disabledActions - these are actions that will be visible but greyed out and unusable.
- disabledActionReason - this is the reason an action is disabled. It will show up as a tooltip when the user hovers on the disabled action.
- hiddenActions - these features will not be shown to the user.
For a complete list of actions that you can disable and hide, see the ThoughtSpot documentation.
Hiding and Disabling in Search
Add the following code to your SearchEmbed component:
disabledActions: [Action.SpotIQAnalyze],
disabledActionReason: 'Enterprise feature.',
hiddenActions: [Action.Download, Action.Share, Action.DownloadAsCsv],
This change will disable SpotIQ and say it’s an “Enterprise feature”. It will hide downloading and sharing options.
For search, you can also hide or change other parts of the UI. For example, you can specify that the datasource panel on the left starts collapsed or pre-populate search tokens.
8. Conclusion
Congratulations! You have successfully embedded search-driven analytics into your application using the ThoughtSpot Visual Embed SDK. These techniques can be used in any JavaScript environment. Not all features from the SDK were covered, so please see the documentation for additional details.